V4.0 and later
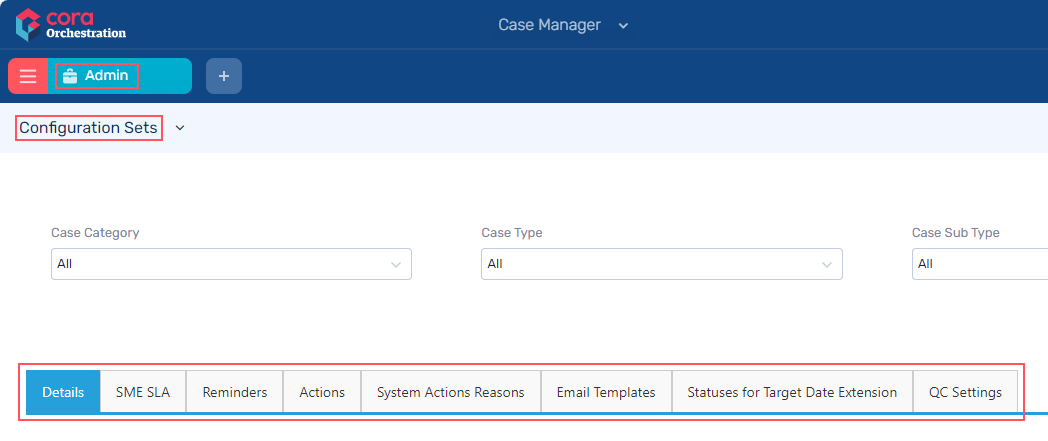
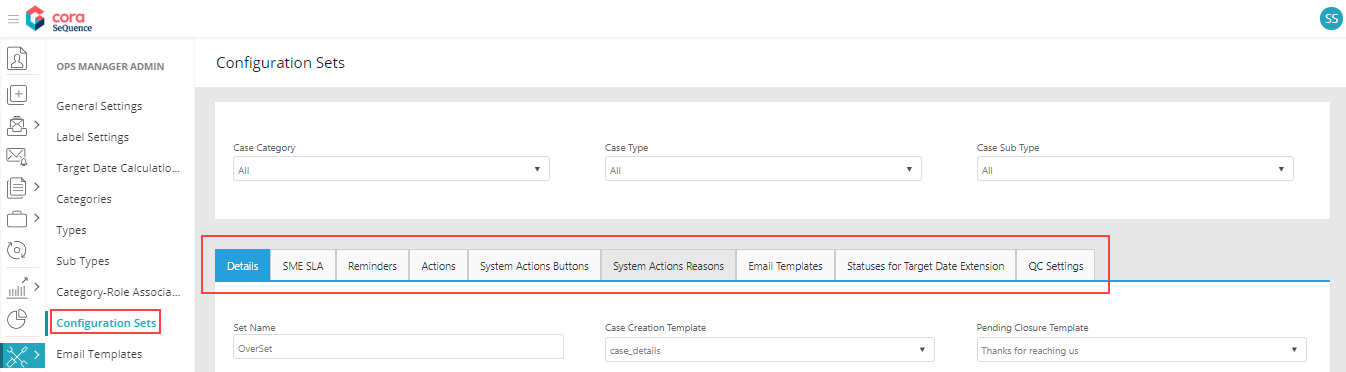
As a Power user, you can define the properties for a Configuration Set on the Configuration Sets page.
On Flowtime, in the hamburger menu go to Admin>Configuration Sets.
Details
On this tab, add details of the Configuration Set:
| Field Name | Description |
|---|---|
| Set Name | To display the unique name of the Configuration Set. Default name displayed is the chosen configuration set, Category > Type > Sub Type. |
| Case Creation Template | To display the list email ids defined in Email Templates section. The chosen email Id will be the default for new case created email notifications for the config set. |
| Client Properties View | Create a workflow, and an activity that will hold the custom views. For details on how to do that, see this article. |
| Case Priority | To define priority of a case. The available out of the box priorities are High, Medium, Low, and Standard. |
| Is Indexing Required? | To select if the case will go to indexing regardless the input channel definition. |
| Message Response Time | To define the time by which a reply needs to be sent for the email message received for a config set. To understand how Cora OpsManager configures the message response time, see this article. |
| Message Response Time Unit | To define the unit in which response time is considered.
|
| TAT | To define the turnaround time for the case. This is the time allowed to solve the cases of this config set. To understand how Cora OpsManager calculates the target date, see this article. |
| TAT Unit | To choose the unit in which TAT is calculated.
|
| Priority Specific TATs | To define the case TAT based on the changed priority (If default priority is changed). Columns in the grid:
|
SME SLA
For each priority, you can set an SLA for SME. When an operator sends the case to SME, he will be able to select the priority in the Send to SME window (in case you added SME SLA to the config set). The SME will be able to see his target date for the response in the query line on the conversation tab.
Reminders
A Reminder is sent for a case related email when no response is received after a set number of days. You can set a maximum of three reminders for each configuration set, and decide time period in business days or hours after which each reminder is sent.
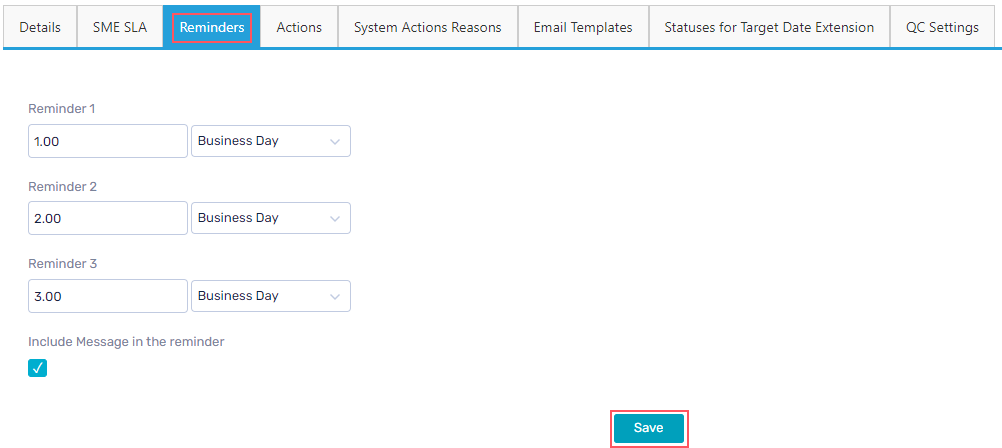
While sending an email, a Reminder Required check box appears in the email window. Selection of this check box decides the sending of email reminders.
For more details, see this article.
Select the Include message in the reminder check box to include the original message to the reminder mail.
Actions
The Actions for a Config Set are defined as per Case status.
When the Case reaches a status, the defined actions (for that status) become available for the Case under Actions section on Case page.
Some actions require reasons, and so the Manage Reasons button appears for these actions. You must add at least one reason for such actions. Each reason is a hierarchic tree field that allows you to type the reason in preferred languages.
Actions available out of the box:
| Action Name | Result | Case status changes to | Comments |
|---|---|---|---|
| On Hold | Puts the case on hold Reason is required | On Hold | Add Make Available for On Hold action |
| Send Approval Email | Generates PDF summary of a case and allows user to send email for external approval. | Awaiting Approval | The Subject of the email will have the keyword [Approval]. On receiving the approval response, the case status changes to Response Received. |
| Make Available | Makes a case available for processing | Ready for Processing Or The status that was previous to On Hold except when the status was With QA/Awaiting Response/Pending Closure/On Hold. In such case, the status will change to the status that was previous to those statuses. | It is recommended to add Make Available action for On hold. |
| Close | Closes a case | Closed | Skips Pending Closure and QA for a case. It is recommended to add Close action when the case status is Pending Closure – Response Received. |
| Reject | Closes a case | Rejected | Rejects a case, without further processing |
| Pending Closure | Checks if QA is needed
| Pending Closure/With QA | Reason is required. In case the response is received after Pending Closure, the status changes to Pending Closure – Response Received. |
| Send to Team Leader | Sends the case to the team leader | With Team Lead | |
| Back to Team Member | Sends the case back to the assigned team member | Ready for Processing | Use only when the status is With Team Leader |
| Send to SME | Assigns the case to the selected SME | With SME | To assign the case to an SME, the SME must exist in the team. |
| Return to Processor | Returns the case from SME to the user who has sent the case to SME | SME Responded | Use only when the status is With SME |
| Return to Team | Returns the case from SME to the team | SME Responded | Use only when the status is With SME |
| Complete Task | Marks the task as complete when approved | Ready for Processing |
System Action Buttons
On this tab of configuration page, you can configure the display of New Email, New Request, and New Comment system action buttons on Case details page.
IMPORTANT
Starting from V3.4, this option is no longer available under Configuration Sets as the Cora OpsManager uses Conversations component from the Cora SeQuence.
System Actions Reason
On this tab of configuration page, you can configure the following system actions that appear for a case in all statuses (except of indexing phase). These actions are supported with reasons.
- Send email
- New request
- New comment
- QA Pass or Fail
- Reject (in indexing task)
| Action Name | Result | Case status changes to | Comments |
|---|---|---|---|
New Email | Sends an email outside of Cora OpsManager | Awaiting response | When a response is received the status changes to Response Received. |
New Request | Sends a task to another team in Cora OpsManager | Internal Request | Once a response is received the status changes to Internal Request Response Received. |
QA Passed | Updates QA result to pass | If QA blocking, Status updated to Pending Closure. If QA not blocking, the case status remains Pending Closure. | Presented only when the status is With QA. |
QA Failed | Updates QA result to fail | If QA blocking, status updated to Audit Correction. If QA not blocking, the case status remains Pending Closure. | Presented only when the status is With QA. |
Reject (In indexing task) | Closes the case | Rejected |
New email reasons
- For each status, you need to create a record with a reason. If there are multiple reasons, you need to create a record for each reason.
- For a specific reason, if you want to change the status of the case to Pending Closure (instead of Awaiting Response), select the Set Pending Close check box.
New request reasons
- For each status, you need to create a record with a reason. If there are multiple reasons, you need to create a record for each reason.
- If you want that a specific reason should change the status of the case to Pending Closure (instead of Internal Request), you should select the Set Pending Close check box.
Reject (In indexing task) reasons
Add reason, and for each reason you can choose to send a rejection email to the requester (by selecting the Send Reject Email check box).
NOTE
- If no reasons are configured for a Set, the reject button will not appear in the indexing task.
- When a case is created via email, it contains only category and type. Hence, to have the reject button, you need to configure the reasons for set with category and type only.
QA failed reasons
Add reasons for Fail action.
NOTE
Reason is mandatory for QA Fail. If there are no reasons, the QA Auditor will not be able to proceed with Fail action.
Email Templates
On this tab of configuration page, choose email templates for the Config Set. The chosen email templates are presented to the operator in the new email window of the case, on clicking Choose Email Template.
Starting from V4.1, you can use Cora Orchestration email templates for email composer in your solution. With these templates, you can add expressions to the email templates.
To use Cora Orchestration email templates, follow the steps below:
- In the Admin site, go to Administration>Global Settings>Application Variables, and set the
UseCCMTemplatesapplication variable value to False. - Select Case Manager solution, and from the Solution Component select Conversations View.
- In the Conversation View window, select Email Settings>Email Templates.
- Click Add New Record to add the required template.
NOTE
For each language, you need to add a different template.
Statuses for Target Date Extension
On this tab, add statuses for configuration sets, which may lead to target date extension. As the case enters these statuses the target date font will change to italics, once the case goes out from the status the system will extend the target date according to working hours that were “missed”.
You can use “Apply to all config set” option while you are on All > All > All set. Clicking on this button, will apply the statuses for target date extension to all config sets.
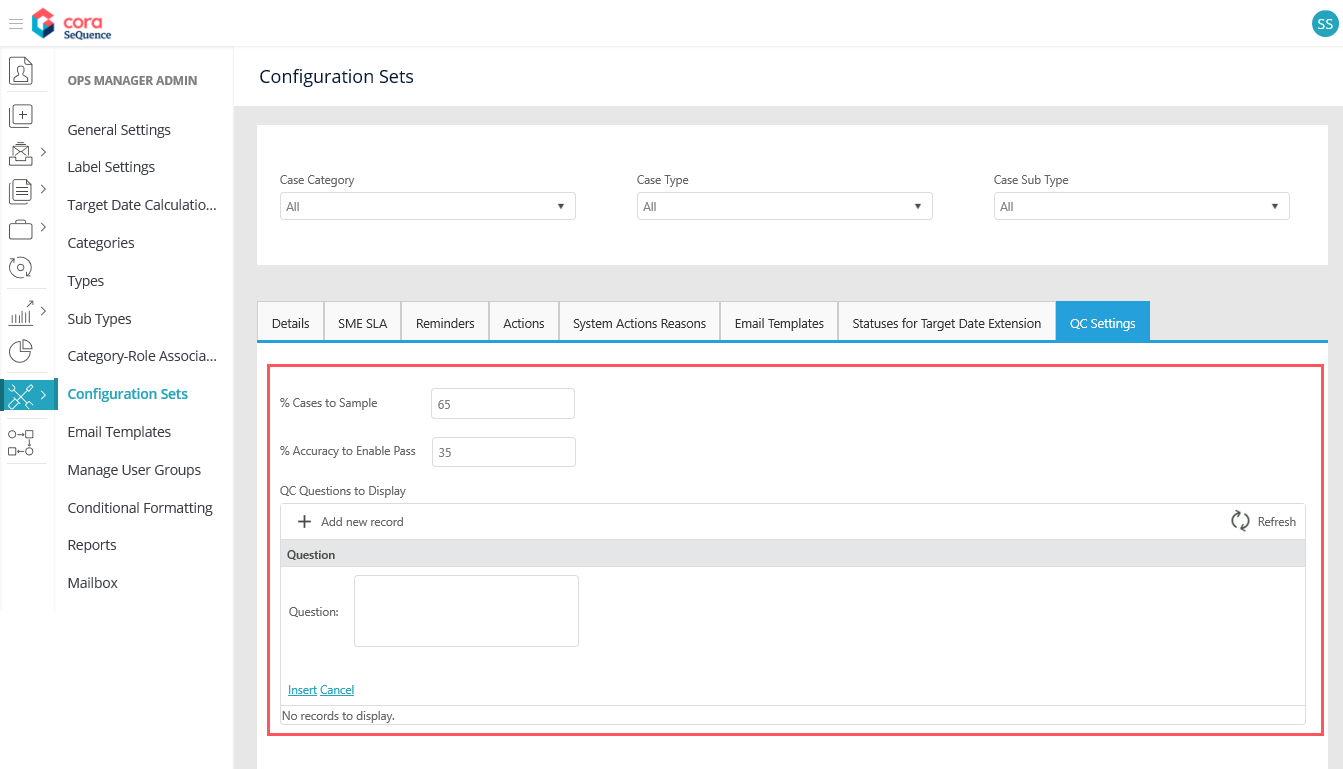
QC Settings
On this tab, add the QC stage settings. Following are the settings made here:
- % Cases to Sample: Percentage of cases that will be sent to QC.
- Minimum passing score: Minimum accuracy percentage required to pass the QC stage.
- QC Questions to Display: Questions that will be part of the QC form.
NOTE
For QC tasks created before upgrade to V4.0.1, the QC score is calculated as earlier.
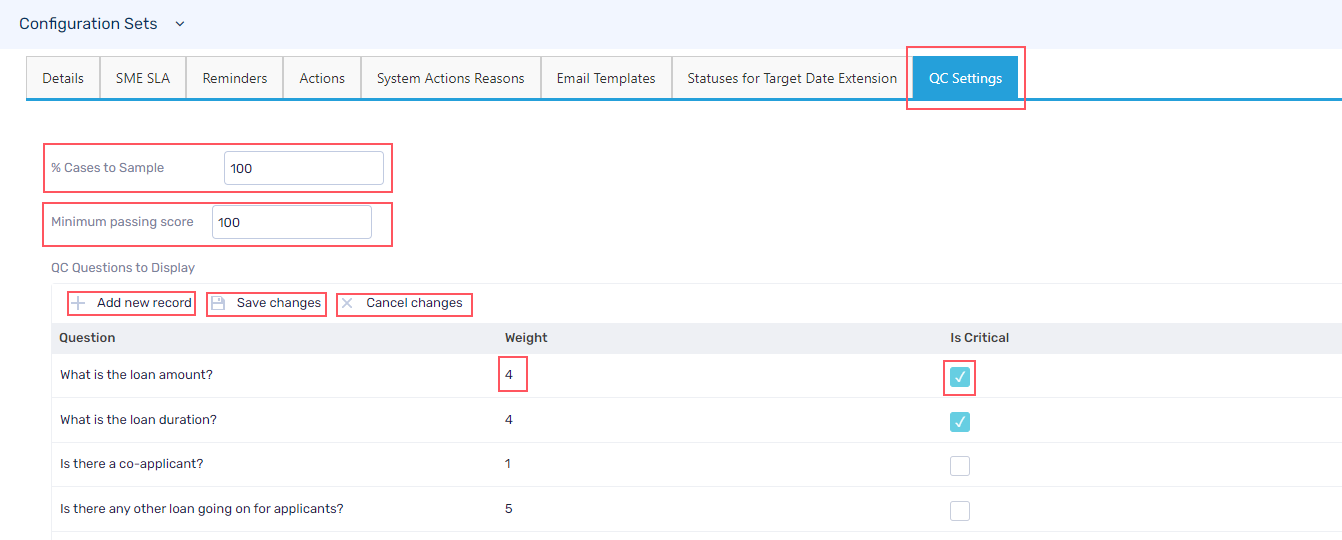
Click Add new record to add a new question. Click Save changes to save any updates made to the existing question. Click Cancel changes to discard the updates made to a question.
You can set weightage for QC questions and based on the weightage a question holds value above others.
You can set questions as critical by selecting the Is Critical option. If the QC selects No for any critical question, then the QC task will not pass.
The accuracy score for a QC task is calculated based on the question weightage and the QC parameter set for each question.
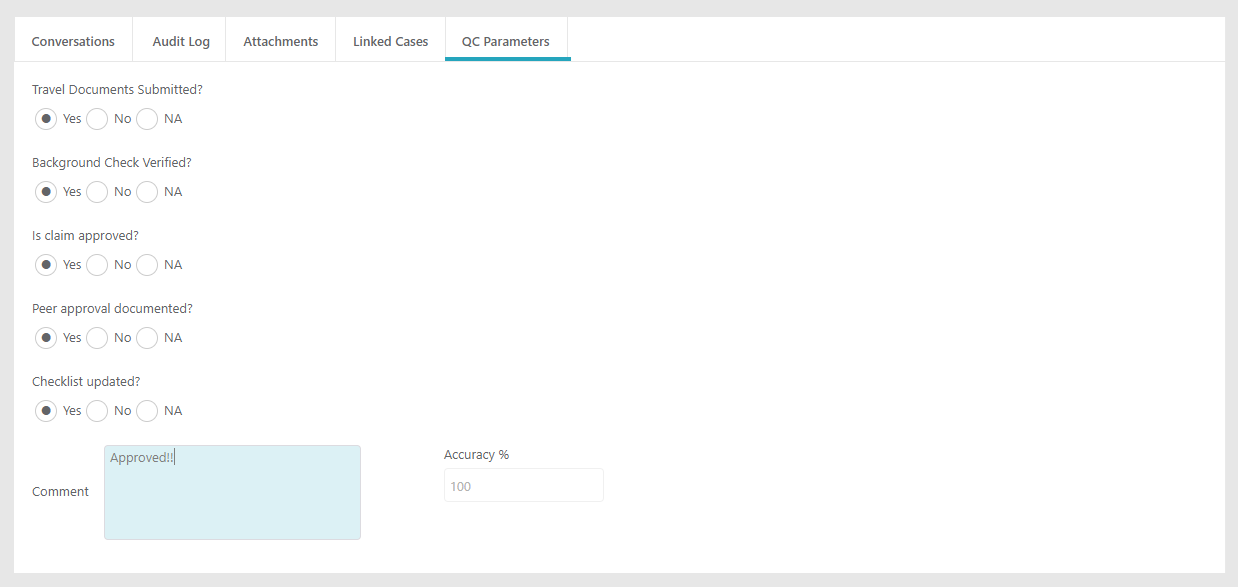
The questions added here are displayed in the QC form along with three options to answer, Yes, No, and NA. The QC auditor may select one of the three as an answer and add comments in the end. Based on the number of questions answered correctly and question weightage the accuracy score is calculated.
V3.x
As a Power user, you can define the properties for a Configuration Set on the Configuration Sets page.
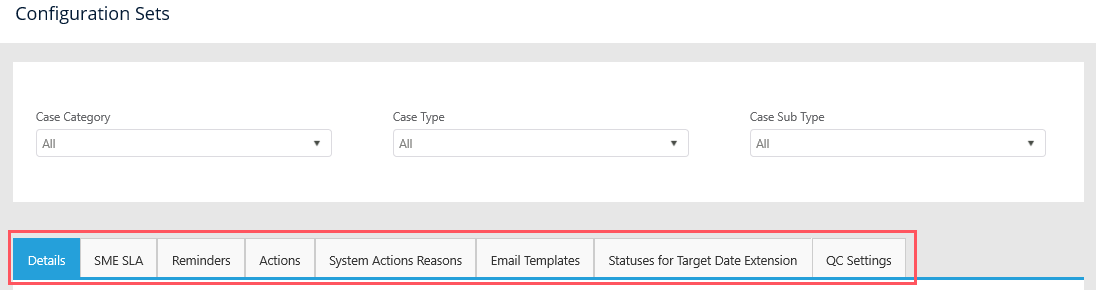
On Flowtime, go to Ops Manager > Ops Manager Admin > Configuration Sets.
Details
On this tab, add details of the Configuration Set:
| Field Name | Description |
|---|---|
| Set Name | To display the unique name of the Configuration Set. Default name displayed is the chosen configuration set, Category > Type > Sub Type. |
| Case Creation Template | To display the list email ids defined in Email Templates section. The chosen email Id will be the default for new case created email notifications for the config set. |
| Client Properties View | Create a workflow, and an activity that will hold the custom views. For details on how to do that, see this article. |
| Case Priority | To define priority of a case. The available out of the box priorities are High, Medium, Low, and Standard. |
| Is Indexing Required? | To select if the case will go to indexing regardless the input channel definition. |
| Message Response Time | To define the time by which a reply needs to be sent for the email message received for a config set. To understand how Cora OpsManager configures the message response time, see this article. |
| Message Response Time Unit | To define the unit in which response time is considered.
|
| TAT | To define the turnaround time for the case. This is the time allowed to solve the cases of this config set. To understand how Cora OpsManager calculates the target date, see this article. |
| TAT Unit | To choose the unit in which TAT is calculated.
|
| Priority Specific TATs | To define the case TAT based on the changed priority (If default priority is changed). Columns in the grid:
|
SME SLA
For each priority, you can set an SLA for SME. When an operator sends the case to SME, he will be able to select the priority in the Send to SME window (in case you added SME SLA to the config set). The SME will be able to see his target date for the response in the query line on the conversation tab.
Reminders
A Reminder is sent for a case related email when no response is received after a set number of days. You can set a maximum of three reminders for each configuration set, and decide time period in business days or hours after which each reminder is sent.

While sending an email, a Reminder Required check box appears in the email window. Selection of this check box decides the sending of email reminders.
For more details, see this article.
Select the Include message in the reminder check box to include the original message to the reminder mail.
Actions
The Actions for a Config Set are defined as per Case status.
When the Case reaches a status, the defined actions (for that status) become available for the Case under Actions section on Case page.
Some actions require reasons, and so the Manage Reasons button appears for these actions. You must add at least one reason for such actions. Each reason is a hierarchic tree field that allows you to type the reason in preferred languages.
Actions available out of the box:
| Action Name | Result | Case status changes to | Comments |
|---|---|---|---|
| On Hold | Puts the case on hold Reason is required | On Hold | Add Make Available for On Hold action |
| Send Approval Email | Generates PDF summary of a case and allows user to send email for external approval. | Awaiting Approval | The Subject of the email will have the keyword [Approval]. On receiving the approval response, the case status changes to Response Received. |
| Make Available | Makes a case available for processing | Ready for Processing Or The status that was previous to On Hold except when the status was With QA/Awaiting Response/Pending Closure/On Hold. In such case, the status will change to the status that was previous to those statuses. | It is recommended to add Make Available action for On hold. |
| Close | Closes a case | Closed | Skips Pending Closure and QA for a case. It is recommended to add Close action when the case status is Pending Closure – Response Received. |
| Reject | Closes a case | Rejected | Rejects a case, without further processing |
| Pending Closure | Checks if QA is needed
| Pending Closure/With QA | Reason is required. In case the response is received after Pending Closure, the status changes to Pending Closure – Response Received. |
| Send to Team Leader | Sends the case to the team leader | With Team Lead | |
| Back to Team Member | Sends the case back to the assigned team member | Ready for Processing | Use only when the status is With Team Leader |
| Send to SME | Assigns the case to the selected SME | With SME | To assign the case to an SME, the SME must exist in the team. |
| Return to Processor | Returns the case from SME to the user who has sent the case to SME | SME Responded | Use only when the status is With SME |
| Return to Team | Returns the case from SME to the team | SME Responded | Use only when the status is With SME |
| Complete Task | Marks the task as complete when approved | Ready for Processing |
System Action Buttons
On this tab of configuration page, you can configure the display of New Email, New Request, and New Comment system action buttons on Case details page.
IMPORTANT
Starting from V3.4, this option is no longer available under Configuration Sets as the Cora OpsManager uses Conversations component from the Cora SeQuence.
System Actions Reason
On this tab of configuration page, you can configure the following system actions that appear for a case in all statuses (except of indexing phase). These actions are supported with reasons.
- Send email
- New request
- New comment
- QA Pass or Fail
- Reject (in indexing task)
| Action Name | Result | Case status changes to | Comments |
|---|---|---|---|
New Email | Sends an email outside of Cora OpsManager | Awaiting response | When a response is received the status changes to Response Received. |
New Request | Sends a task to another team in Cora OpsManager | Internal Request | Once a response is received the status changes to Internal Request Response Received. |
QA Passed | Updates QA result to pass | If QA blocking, Status updated to Pending Closure. If QA not blocking, the case status remains Pending Closure. | Presented only when the status is With QA. |
QA Failed | Updates QA result to fail | If QA blocking, status updated to Audit Correction. If QA not blocking, the case status remains Pending Closure. | Presented only when the status is With QA. |
Reject (In indexing task) | Closes the case | Rejected |
New email reasons
- For each status, you need to create a record with a reason. If there are multiple reasons, you need to create a record for each reason.
- For a specific reason, if you want to change the status of the case to Pending Closure (instead of Awaiting Response), select the Set Pending Close check box.
New request reasons
- For each status, you need to create a record with a reason. If there are multiple reasons, you need to create a record for each reason.
- If you want that a specific reason should change the status of the case to Pending Closure (instead of Internal Request), you should select the Set Pending Close check box.
Reject (In indexing task) reasons
Add reason, and for each reason you can choose to send a rejection email to the requester (by selecting the Send Reject Email check box).
NOTE
- If no reasons are configured for a Set, the reject button will not appear in the indexing task.
- When a case is created via email, it contains only category and type. Hence, to have the reject button, you need to configure the reasons for set with category and type only.
QA failed reasons
Add reasons for Fail action.
NOTE
Reason is mandatory for QA Fail. If there are no reasons, the QA Auditor will not be able to proceed with Fail action.
Email Templates
On this tab of configuration page, choose email templates for the Config Set. The chosen email templates are presented to the operator in the new email window of the case, on clicking Choose Email Template.
Statuses for Target Date Extension
On this tab, add statuses for configuration sets, which may lead to target date extension. As the case enters these statuses the target date font will change to italics, once the case goes out from the status the system will extend the target date according to working hours that were “missed”.
You can use “Apply to all config set” option while you are on All > All > All set. Clicking on this button, will apply the statuses for target date extension to all config sets.
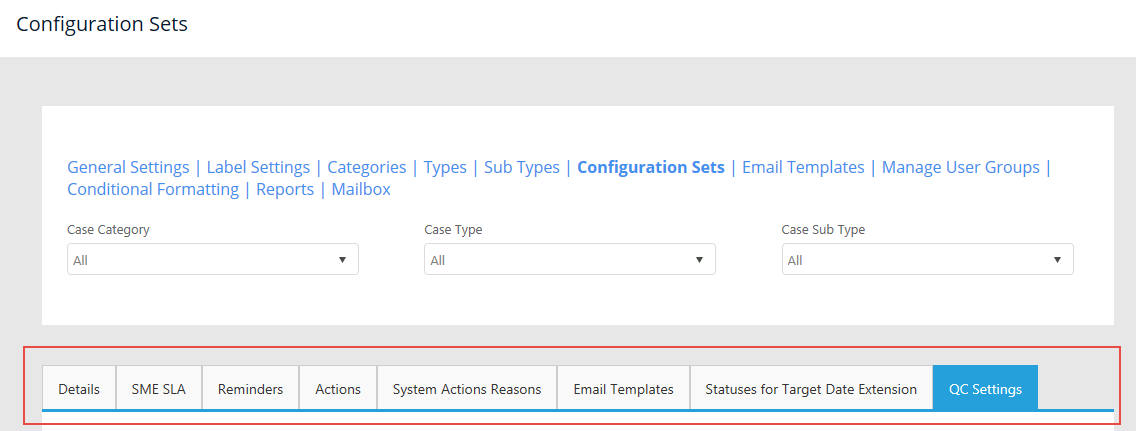
QC Settings
On this tab, add the QC stage settings. Following are the settings made here:
- % Cases to Sample: Percentage of cases that will be sent to QC.
- % Accuracy to Enable Pass: Minimum accuracy percentage required to pass the QC stage.
- QC Questions to Display: Questions that will be part of the QC form.
Click Insert to save the question, or click Cancel to discard.
The questions added here are displayed in the QC form along with three options to answer, Yes, No, and NA. The QC auditor may select one of the three as an answer and add comments in the end. Based on the number of questions answered correctly and question weightage the accuracy score is calculated.
V3.2
As a Power user, you can define the properties for a Configuration Set on the Configuration Sets page.
On Flowtime, go to Ops Manager > Ops Manager Admin > Configuration Sets.
Details
On this tab, add details of the Config Set:
| Field Name | Description |
|---|---|
| Set Name | To display the unique name of the Config Set. Default name displayed is the chosen configuration set, Category > Type > Sub Type. |
| Case Creation Template | To display the list email ids defined in Email Templates section. The chosen email Id will be the default for new case created email notifications for the config set. |
| Client Properties View | Create a workflow, and an activity that will hold the custom views. For details on how to do that, see this article. |
| Case Priority | To define priority of a case. The available out of the box priorities are High, Medium, Low, and Standard. |
| Is Indexing Required? | To select if the case will go to indexing regardless the input channel definition. |
| Message Response Time | To define the time by which a reply needs to be sent for the email message received for a config set. To understand how Cora OpsManager configures the message response time, see this article. |
| Message Response Time Unit | To define the unit in which response time is considered.
|
| TAT | To define the turnaround time for the case. This is the time allowed to solve the cases of this config set. To understand how Cora OpsManager calculates the target date, see this article. |
| TAT Unit | To choose the unit in which TAT is calculated.
|
| Priority Specific TATs | To define the case TAT based on the changed priority (If default priority is changed). Columns in the grid:
|
SME SLA
For each priority, you can set an SLA for SME. When an operator sends the case to SME, he will be able to select the priority in the Send to SME window (in case you added SME SLA to the config set). The SME will be able to see his target date for the response in the query line on the conversation tab.
Reminders
A Reminder is sent for an email id when no response is received after a set number of days. You can set a maximum of three reminders for each config set, and decide after how many days each reminder will be sent.
Once the case is closed, the reminders will not be sent anymore.
Select the Include message in the reminder check box to include the original message to the reminder mail.
Actions
The Actions for a Config Set are defined as per Case status.
When the Case reaches a status, the defined actions (for that status) become available for the Case under Actions section on Case page.
Some actions require reasons, and so the Manage Reasons button appears for these actions. You must add at least one reason for such actions. Each reason is a hierarchic tree field that allows you to type the reason in preferred languages.
Actions available out of the box:
| Action Name | Result | Case status changes to | Comments |
|---|---|---|---|
| On Hold | Puts the case on hold Reason is required | On Hold | Add Make Available for On Hold action |
| Send Approval Email | Generates PDF summary of a case and allows user to send email for external approval. | Awaiting Approval | The Subject of the email will have the keyword [Approval]. On receiving the approval response, the case status changes to Response Received. |
| Make Available | Makes a case available for processing | Ready for Processing Or The status that was previous to On Hold except when the status was With QA/Awaiting Response/Pending Closure/On Hold. In such case, the status will change to the status that was previous to those statuses. | It is recommended to add Make Available action for On hold, Awaiting response, Approval response received, Pending closure response received, Internal request response received, and Approval cycle rejected. |
| Close | Closes a case | Closed | Skips Pending Closure and QA for a case. It is recommended to add Close action when the case status is Pending Closure – Response Received. |
| Reject | Closes a case | Rejected | Rejects a case, without further processing |
| Pending Closure | Checks if QA is needed
| Pending Closure/With QA | Reason is required. In case the response is received after Pending Closure, the status changes to Pending Closure – Response Received. |
| Send to Team Leader | Sends the case to the team leader | With Team Lead | |
| Back to Team Member | Sends the case back to the assigned team member | Ready for Processing | Use only when the status is With Team Leader |
| Send to SME | Assigns the case to the selected SME | With SME | To assign the case to an SME, the SME must exist in the team. |
| Return to Processor | Returns the case from SME to the user who has sent the case to SME | SME Responded | Use only when the status is With SME |
| Return to Team | Returns the case from SME to the team | SME Responded | Use only when the status is With SME |
| Complete Task | Marks the task as complete when approved | Ready for Processing |
System Action Buttons
On this tab of configuration page, you can configure the display of New Email, New Request, and New Comment system action buttons on Case details page.
System Actions Reason
On this tab of configuration page, you can configure the following system actions that appear for a case in all statuses (except of indexing phase). These actions are supported with reasons.
- Send email
- New request
- New comment
- QA Pass or Fail
- Reject (in indexing task)
| Action Name | Result | Case status changes to | Comments |
|---|---|---|---|
New Email | Sends an email outside of Cora OpsManager | Awaiting response | When a response is received the status changes to Response Received. |
New Request | Sends a task to another team in Cora OpsManager | Internal Request | Once a response is received the status changes to Internal Request Response Received. |
QA Passed | Updates QA result to pass | If QA blocking, Status updated to Pending Closure. If QA not blocking, the case status remains Pending Closure. | Presented only when the status is With QA. |
QA Failed | Updates QA result to fail | If QA blocking, status updated to Audit Correction. If QA not blocking, the case status remains Pending Closure. | Presented only when the status is With QA. |
Reject (In indexing task) | Closes the case | Rejected |
New email reasons
- For each status, you need to create a record with a reason. If there are multiple reasons, you need to create a record for each reason.
- For a specific reason, if you want to change the status of the case to Pending Closure (instead of Awaiting Response), select the Set Pending Close check box.
New request reasons
- For each status, you need to create a record with a reason. If there are multiple reasons, you need to create a record for each reason.
- If you want that a specific reason should change the status of the case to Pending Closure (instead of Internal Request), you should select the Set Pending Close check box.
Reject (In indexing task) reasons
Add reason, and for each reason you can choose to send a rejection email to the requester (by selecting the Send Reject Email check box).
NOTE
- If no reasons are configured for a Set, the reject button will not appear in the indexing task.
- When a case is created via email, it contains only category and type. Hence, to have the reject button, you need to configure the reasons for set with category and type only.
QA failed reasons
Add reasons for Fail action.
NOTE
Reason is mandatory for QA Fail. If there are no reasons, the QA Auditor will not be able to proceed with Fail action.
Email Templates
On this tab of configuration page, choose email templates for the Config Set. The chosen email templates are presented to the operator in the new email window of the case, on clicking Choose Email Template.
Statuses for Target Date Extension
On this tab, add statuses for configuration sets, which may lead to target date extension. As the case enters these statuses the target date font will change to italics, once the case goes out from the status the system will extend the target date according to working hours that were “missed”.
You can use “Apply to all config set” option while you are on All > All > All set. Clicking on this button, will apply the statuses for target date extension to all config sets.
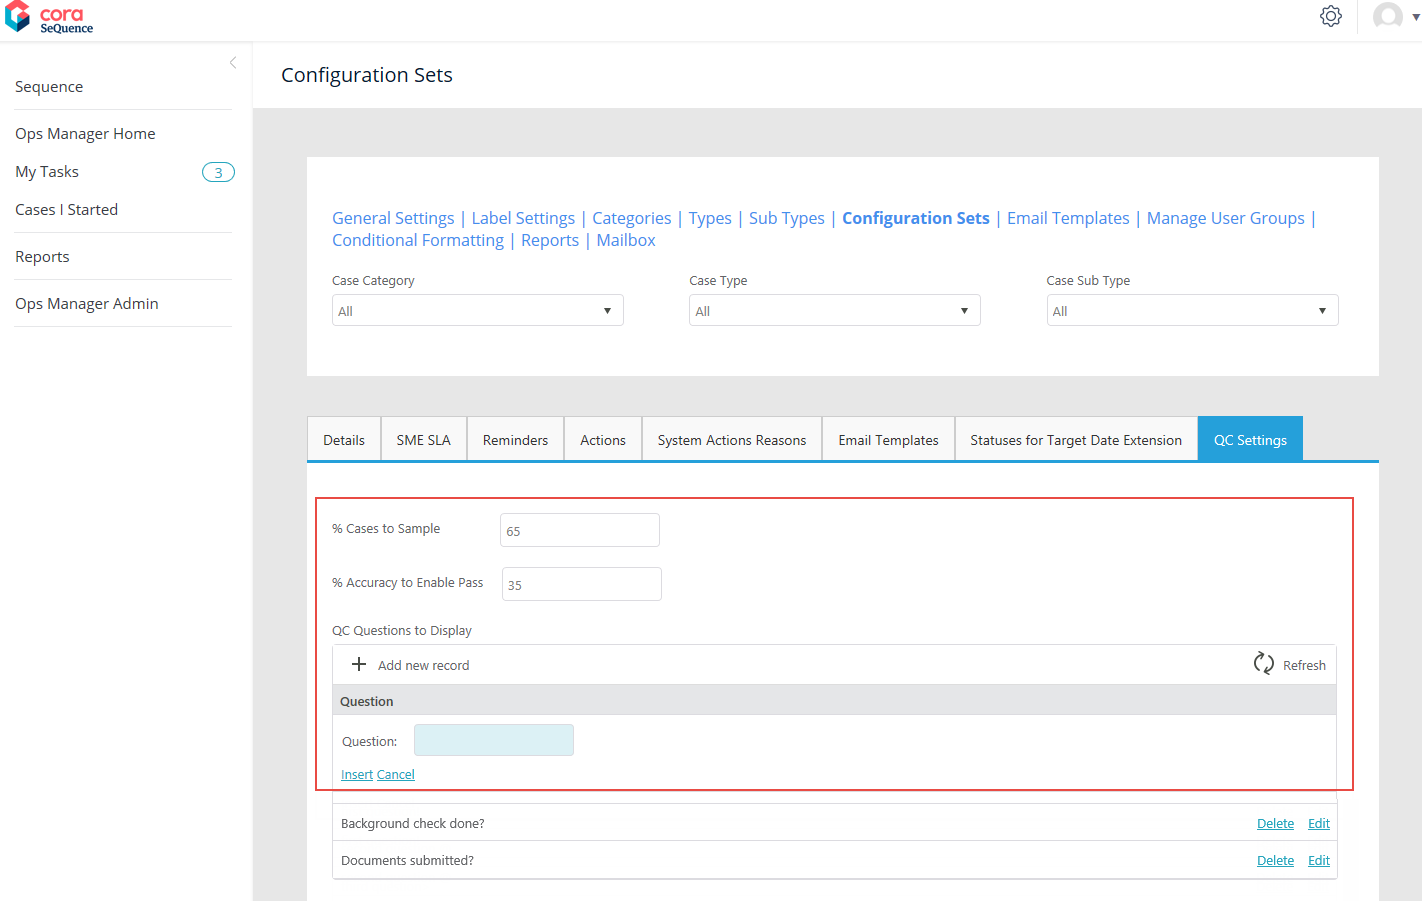
QC Settings
On this tab, add the QC stage settings. Following are the settings made here:
- % Cases to Sample: Percentage of cases that will be sent to QC.
- % Accuracy to Enable Pass: Minimum accuracy percentage required to pass the QC stage.
- QC Questions to Display: Questions that will be part of the QC form.
Click Insert to save the question, or click Cancel to discard.
The questions added here are displayed in the QC form along with three options to answer, Yes, No, and NA. The QC auditor may select one of the three radio buttons as an answer and add comments in the end. Based on the number of questions answered correctly the accuracy level is calculated.
V3.0
The properties for a Config Set are defined on various tabs on the Configuration Sets page.
Details
On this tab, add details of the Config Set:
| Field Name | Description |
|---|---|
| Set Name | To display the unique name of the Config Set. Default name displayed is the chosen configuration set, Category > Type > Sub Type. |
| Case Creation Template | To display the list email ids defined in Email Templates section. The chosen email Id will be the default for new case created email notifications for the config set. |
| Client Properties View | Create a workflow, and an activity that will hold the custom views. For details on how to do that, see the related article, Create Client Properties View. |
| Case Priority | To define priority of a case. The available out of the box priorities are High, Medium, Low, and Standard. |
| Is Indexing Required? | To select if the case will go to indexing regardless the input channel definition. |
| TAT | To define the turnaround time for the case. This is the time allowed to solve the cases of this config set. To understand how Cora OpsManager calculates the target date, see the related article, Target Date Calculation. |
| TAT Unit | To choose the unit in which TAT is calculated.
|
| Priority Specific TATs | To define the case TAT based on the changed priority (If default priority is changed). Columns in the grid:
|
SME SLA
For each priority, you can set an SLA for SME. When an operator sends the case to SME, he will be able to select the priority in the Send to SME window (in case you added SME SLA to the config set). The SME will be able to see his target date for the response in the query line on the conversation tab.
Reminders
A Reminder is sent for an email id when no response is received after a set number of days. You can set a maximum of three reminders for each config set, and decide after how many days each reminder will be sent.
Once the case is closed, the reminders will not be sent anymore.
Select the Include message in the reminder check box to include the original message to the reminder mail.
Actions
The Actions for a Config Set are defined as per Case status.
When the Case reaches a status, the defined actions (for that status) become available for the Case under Actions section on Case page.
Some actions require reasons, and so the Manage Reasons button appears for these actions. You must add at least one reason for such actions. Each reason is a hierarchic tree field that allows you to type the reason in preferred languages.
Actions available out of the box:
| Action Name | Result | Case status changes to | Comments |
|---|---|---|---|
| On Hold | Puts the case on hold Reason is required | On Hold | Add Make Available for On Hold action |
| Send Approval Email | Generates PDF summary of a case and allows user to send email for external approval. | Awaiting Approval | The Subject of the email will have the keyword [Approval]. On receiving the approval response, the case status changes to Response Received. |
| Make Available | Makes a case available for processing | Ready for Processing Or The status that was previous to On Hold except when the status was With QA/Awaiting Response/Pending Closure/On Hold. In such case, the status will change to the status that was previous to those statuses. | It is recommended to add Make Available action for On hold, Awaiting response, Approval response received, Pending closure response received, Internal request response received, and Approval cycle rejected. |
| Close | Closes a case | Closed | Skips Pending Closure and QA for a case. It is recommended to add Close action when the case status is Pending Closure – Response Received. |
| Reject | Closes a case | Rejected | Rejects a case, without further processing |
| Pending Closure | Checks if QA is needed
| Pending Closure/With QA | Reason is required. In case the response is received after Pending Closure, the status changes to Pending Closure – Response Received. |
| Send to Team Leader | Sends the case to the team leader | With Team Lead | |
| Back to Team Member | Sends the case back to the assigned team member | Ready for Processing | Use only when the status is With Team Leader |
| Send to SME | Assigns the case to the selected SME | With SME | To assign the case to an SME, the SME must exist in the team. |
| SME Return to Processor | Returns the case to the user who has sent the case to SME | SME Responded | Use only when the status is With SME |
| SME Return to Team | Returns the case to the team | SME Responded | Use only when the status is With SME |
System Actions Reason
On this tab of configuration page, system actions are configured. These actions are supported with reasons.
The following are the system actions that appear for a case in all statuses (except of indexing phase):
- Send email
- New request
- New comment
- QA Pass or Fail
- Reject (in indexing task)
| Action Name | Result | Case status changes to | Comments |
|---|---|---|---|
New Email | Sends an email outside of Cora OpsManager | Awaiting response | When a response is received the status changes to Response Received. |
New Request | Sends a task to another team in Cora OpsManager | Internal Request | Once a response is received the status changes to Internal Request Response Received. |
QA Passed | Updates QA result to pass | If QA blocking, Status updated to Pending Closure. If QA not blocking, the case status remains Pending Closure. | Presented only when the status is With QA. |
QA Failed | Updates QA result to fail | If QA blocking, status updated to Audit Correction. If QA not blocking, the case status remains Pending Closure. | Presented only when the status is With QA. |
Reject (In indexing task) | Closes the case | Rejected |
New Email Reasons
- For each status, you need to create a record with a reason. If there are multiple reasons, you need to create a record for each reason.
- For a specific reason, if you want to change the status of the case to Pending Closure (instead of Awaiting Response), select the Set Pending Close check box.
New Request Reasons
- For each status, you need to create a record with a reason. If there are multiple reasons, you need to create a record for each reason.
- If you want that a specific reason should change the status of the case to Pending Closure (instead of Internal Request), you should select the Set Pending Close check box.
Reject (In indexing task) Reasons
Add reason, and for each reason you can choose to send a rejection email to the requester (by selecting the Send Reject Email check box).
NOTE
- If no reasons are configured for a Set, the reject button will not appear in the indexing task.
- When a case is created via email, it contains only category and type. Hence, to have the reject button, you need to configure the reasons for set with category and type only.
QA Failed Reasons
Add reasons for Fail action.
NOTE
Reason is mandatory for QA Fail. If there are no reasons, the QA Auditor will not be able to proceed with Fail action.
Email Templates
On this tab of configuration page, choose email templates for the Config Set. The chosen email templates are presented to the operator in the new email window of the case, on clicking Choose Email Template.
Statuses for Target Date Extension
On this tab, add statuses for configuration sets, which may lead to target date extension. As the case enters these statuses the target date font will change to italics, once the case goes out from the status the system will extend the target date according to working hours that were “missed”.
You can use “Apply to all config set” option while you are on All > All > All set. Clicking on this button, will apply the statuses for target date extension to all config sets.
QC Settings
On this tab, add the QC stage settings. Following are the settings made here:
- % Cases to Sample: Percentage of cases that will be sent to QC.
- % Accuracy to Enable Pass: Minimum accuracy percentage required to pass the QC stage.
- QC Questions to Display: Questions that will be part of the QC form.
Click Insert to save the question, or click Cancel to discard.
The questions added here are displayed in the QC form along with three options to answer, Yes, No, and NA. The QC auditor may select one of the three radio buttons as an answer and add comments in the end. Based on the number of questions answered correctly the accuracy level is calculated.
Previous to V3.0
The properties for a Config Set are defined on various tabs on the Configuration Sets page.
Details
On this tab, add details of the Config Set:
Field name | Description |
Set Name | Text box, to display the unique name of the Config Set. Default name displayed is the chosen configuration set, Category > Type > Sub Type. |
Case Creation Template | Drop-down list, to display the list email ids defined in Email Templates section. The chosen email id will be the default for new case created email notifications for the config set. |
Client Properties View | Text box, to display the view chosen for the config set. The fields from the view appear in the properties section of the Case created with this config set. The view name is available at: Workflow > Customizations > Views > ICM Customizable view > Client properties view. Inside client properties views, create two views:
To create a new view, duplicate the Test view, which has the style guideline for this form. |
Case Priority | Drop-down list, to define priority of a case. The available out of the box priorities are High, Medium, Low, and Standard. |
Is Indexing Required? | Check box, to select if the case will go to indexing regardless the input channel definition. |
TAT | Text box, to define turnaround time for the case. This is the time allowed to solve cases of this config set. To understand how Cora OpsManager calculates the target date, see the related article, Target Date Calculation. |
TAT Unit | Drop-down list, to choose the unit in which TAT is calculated.
|
Priority Specific TATs | Grid, to define the case TAT based on the changed priority (if default priority is changed). Columns in the grid:
|
SME SLA
For each priority, you can set an SLA for SME. When an operator sends the case to SME, he will be able to select the priority in the Send to SME window (in case you added SME SLA to the config set). The SME will be able to see his target date for the response in the query line on the conversation tab.
Reminders
A Reminder is sent for an email id when no response is received after a set number of days. You can set a maximum of three reminders for each config set, and decide after how many days each reminder will be sent.
Once the case is closed, the reminders will not be sent anymore.
Select the Include message in the reminder check box to include the original message to the reminder mail.
Actions
The Actions for a Config Set are defined as per Case status.
When the Case reaches a status, the defined actions (for that status) become available for the Case under Actions section on Case page.
Some actions require reasons, and therefore Manage Reasons button will appear for these actions. You must add at least one reason for such actions. Each reason is a hierarchic tree field that allows you to type the reason in preferred languages.
Actions available out of the box:
Action Name | Result | Case status changes to | Comments |
On Hold | Puts the case on hold Reason is required | On Hold | Add Make Available for On Hold action. |
Send Approval Email | Generates PDF summary of a case and allows user to send email for external approval. | Awaiting Approval | The Subject of the email will have [Approval] in the subject. On receiving approval response, the case status changes to Response Received. |
Make Available | Makes a case available for processing. | Ready for Processing Or The status that was previous to On Hold except when the status was With QA/Awaiting Response/Pending Closure/On Hold. In such case, the status will change to the status that was previous to those statuses. | It is recommended to add Make Available action for On hold, Awaiting response, Approval response received, Pending closure response received, Internal request response received, and Approval cycle rejected. |
Close | Closes a Case | Closed | Skips Pending Closure and QA for a case. It is recommended to add Close action when the case status is Pending Closure – Response Received. |
Reject | Closes a Case | Rejected | Rejects a case without further processing. |
Pending Closure | Checks if QA is needed
| Pending Closure/with QA | Reason is required. In case the response is received after Pending Closure, the status changes to Pending Closure – Response Received. |
Send to Team Leader | Sends case to the team leader | With Team Lead | |
Back to Team Member | Sends case back to assigned processor | Ready for Processing | Use only when the status is With Team Leader. |
Send to SME | Assigns case to the selected SME | With SME | To assign a case to SME, an SME must exist in a Team. |
SME Return to Processor | Returns case to the user who sent to SME | SME Responded | Use only when the status is With SME. |
SME Return to Team | Returns case to the team | SME Responded | Use only when the status is With SME. |
System Actions Reason
On this tab of configuration page, system actions are configured. These actions are supported with reasons.
The following are the system actions that appear for a case in all statuses (except of indexing phase):
- Send email
- New request
- New comment
- QA Pass or Fail
- Reject (in indexing task)
Action Name | Result | Case status changes to | Comments |
New Email | Sends an email outside of Cora OpsManager | Awaiting response | When a response is received the status changes to Response Received. |
New Request | Sends a task to another team in Cora OpsManager | Internal Request | Once a response is received the status changes to Internal Request Response Received. |
QA Passed | Updates QA result to pass | If QA blocking, Status updated to Pending Closure. If QA not blocking, the case status remains Pending Closure. | Presented only when the status is With QA. |
QA Failed | Updates QA result to fail | If QA blocking, status updated to Audit Correction. If QA not blocking, the case status remains Pending Closure. | Presented only when the status is With QA. |
Reject (In indexing task) | Closes the case | Rejected |
New Email Reasons
- For each status, you need to create a record with a reason. If there are multiple reasons, you need to create a record for each reason.
- For a specific reason, if you want to change the status of the case to Pending Closure (instead of Awaiting Response), select the Set Pending Close check box.
New Request Reasons
- For each status, you need to create a record with a reason. If there are multiple reasons, you need to create a record for each reason.
- If you want that a specific reason should change the status of the case to Pending Closure (instead of Internal Request), you should select the Set Pending Close check box.
Reject (In indexing task) Reasons
Add reason, and for each reason you can choose to send a rejection email to the requester (by selecting the Send Reject Email check box).
NOTE
- If no reasons are configured for a Set, the reject button will not appear in the indexing task.
- When a case is created via email, it contains only category and type. Hence, to have the reject button, you need to configure the reasons for set with category and type only.
QA Failed Reasons
Add reasons for Fail action.
NOTE:
Reason is mandatory for QA Fail. If there are no reasons, the QA Auditor will not be able to proceed with Fail action.
Email Templates
On this tab of configuration page, choose email templates for the Config Set. The chosen email templates are presented to the operator in the new email window of the case, on clicking Choose Email Template.
Statuses for Target Date Extension
On this tab, add statuses for configuration sets, which may lead to target date extension. As the case enters these statuses the target date font will change to italics, once the case goes out from the status the system will extend the target date according to working hours that were “missed”.
You can use “Apply to all config set” option while you are on All > All > All set. Clicking on this button, will apply the statuses for target date extension to all config sets.
QC Settings
On this tab, add the QC stage settings. Following are the settings made here:
- % Cases to Sample: Percentage of cases that will be sent to QC.
- % Accuracy to Enable Pass: Minimum accuracy percentage required to pass the QC stage.
- QC Questions to Display: Questions that will be part of the QC form.
Click Insert to save the question, or click Cancel to discard.
The questions added here are displayed in the QC form along with three options to answer, Yes, No, and NA. The QC auditor may select one of the three radio buttons as an answer and add comments in the end. Based on the number of questions answered correctly the accuracy level is calculated.
