Overview
This document targets architects and tech leads.
There are two options for customizing Cora SeQuence: creating a custom application or using release pipelines to deploy small changes.
When should you use a pipeline?
How do you decide if you need to create a custom application or run a release pipeline?
| Use a release pipeline to | Create a custom application when you |
|---|---|
|
|
Types of pipelines
There are two types of platform release pipelines.
| Installation pipeline | Customization pipelines (Release Shared Resources) |
|---|---|
| These pipelines copy files and perform XDT transformations from project repos into the Cora SeQuence platform servers and environments. |
Create the customization repos
The pipelines takes artifacts (files) from a repo and deploys them to an environment.
You can create as many Azure Git repos as you need.
The recommendation is one repo for the custom applications, if you have, and separate repos for each of the main folders. This setup provides greater flexibility when deploying specific versions, as the repos are separated.
- If you have multi-language requirements you need to add or change files in these two folders: ‘Shared Resources’ and ‘AppGlobalResources’. Use one or two separate repos for these files.
- If you need to add new files and pages, you need to have a separate repo for them.
- If you have transformations, for menus, or config files create a separate repo for the files.
Create the customization pipeline
Same format/template/procedure… Most of the steps are similar. The difference is mainly on the agents, tasks, environment, and approvals.
Remember to save your work after every step.
- On Azure DevOps, select Pipelines>Releases.
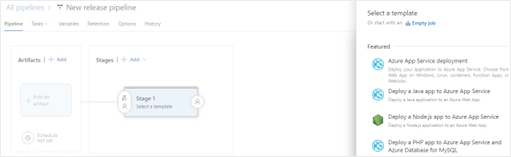
- Click + New, and then select + New release pipeline.

- At the top-right corner, click Empty job.
- Add artifacts to the pipeline.
You can add as many repos (artifacts) to the pipeline. When the pipeline runs, it downloads the files from the repos to the servers to be copied or transformed.- Click the + Add link.
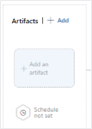
- Click the + Add link.
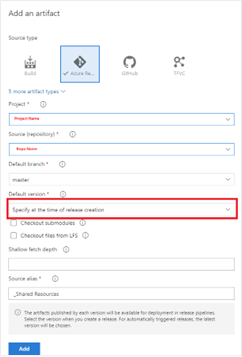
- Select Azure repos Git.

- Select the current project (or another project that contains the files), the repo name, and under default version, select Specify at the time of release creation.
- If required, add more artifacts (repos) by repeating steps 1 to 3.
The release pipeline should look like this: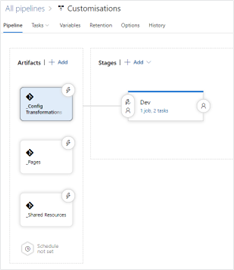


Create the first stage and add tasks
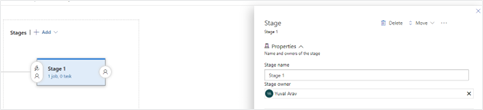
It’s recommended to rename the stage to reflect the environment.
- Click the stage box and update the Stage name property on the properties pane.
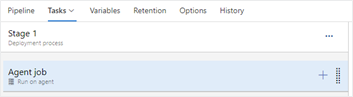
- Create tasks.
To see the tasks list, click 1 job, 0 task.
First, you need to set the agent to be the same as the platform pipeline.
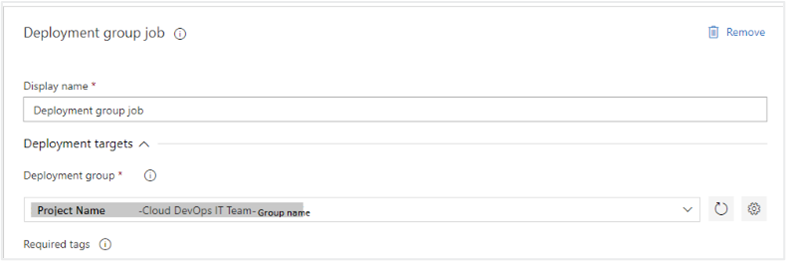
For that, you need to delete the ‘agent job’ and add ‘deployment group job’.- To delete the ‘Agent job’ select it, and then press Delete on your keyboard.
- Confirm the deletion.
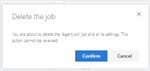
- To delete the ‘Agent job’ select it, and then press Delete on your keyboard.
- Next, add a deployment group job.
Click the ellipsis button (…), and then select Add a deployment group job.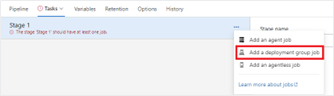
- In the ‘Deployment group’ drop down list, select the relevant deployment group.


Note
In some projects, the customer IT team creates the agent for each environment. In such cases, you don’t need to create a new one. You select the agent from the Deployment Group drop-down list.
- Option 1: Customer IT has already created an agent.
- Option 2: Create the agent from scratch.
- Option 3: Share an existing agent from another project.
- If an agent already exists in another project, you can share it to use it in your pipeline.
To share a ‘deployment group’, you need to click the ‘Pipelines’/‘Deployment groups’, and then click the group you want to share. - In the properties screen, click the Share button.


Note
You need permissions to the project from which you want to share the agent.
Add more tasks
There are a few different scenarios or tasks that can be used in the pipeline: File copy and File transformations. In some cases, you need to use File Tokens.
File Copy
- The first step is to delete the ‘.git’ folder from the artifacts folder.
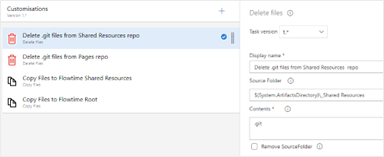
- The second step is to set the file copy. The target folder is the physical folder. If both Flowtime and Administration are installed in the same server, you need to add another ‘Copy Files’ and set the target folder appropriately.
- Under Advanced, make sure that the ‘Overwrite’ option is selected.
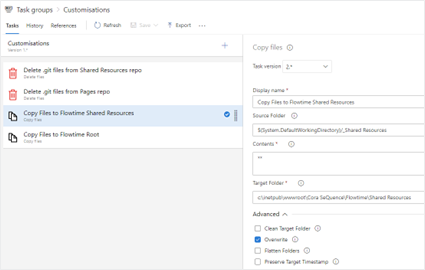


*The ‘_Shared Resources’ is the ‘Source alias’ from the artifacts.
File transformations
You should NOT replace any Cora SeQuence file with your own files. You should only transform the content of the files.
For example, add or change menus or edit a config file.
Azure DevOps pipelines support XDT transformation and you can either transform an existing file, or create a new file.
Use the ‘XDT Transform’ task, in the Transformations field.
Syntax: {xdt path} => {xml path}[ => {output path}]
The output path is not mandatory.
Transform Portal Menu task![]()
Transform Services Files![]()
File tokens
In some cases, you will need to ‘tokenize’ the config files and have different values for each stage (environment). To do this, use the ‘Replace Tokens’ task.
Tokenized files are files with a ‘token’ representing a value to be set differently on the different environments. The values are driven by the pipeline variables. A token is the variable name surrounded by #{Variable name}#
 The target files are the physical locations of the tokenized files.
Add a new variable
- Open Variables.

- To add a new variable, click the + Add button.
- Set the variable name and set the scope to be the stage (environment), and then select the appropriate value for this stage.
- To add a value to a different stage, add a new variable, and then give it the same name.

Set approvers to the stage
Each stage should have an approval cycle before it starts and another one after it completes.
The approval before the release stage ensures that the target environment is ready for the release. For example, before releasing to QA, you want to make sure that all the QA activities have been completed.
The approval after the state is like a thumbs up to the release. This approval should be granted only after a quick smoke test.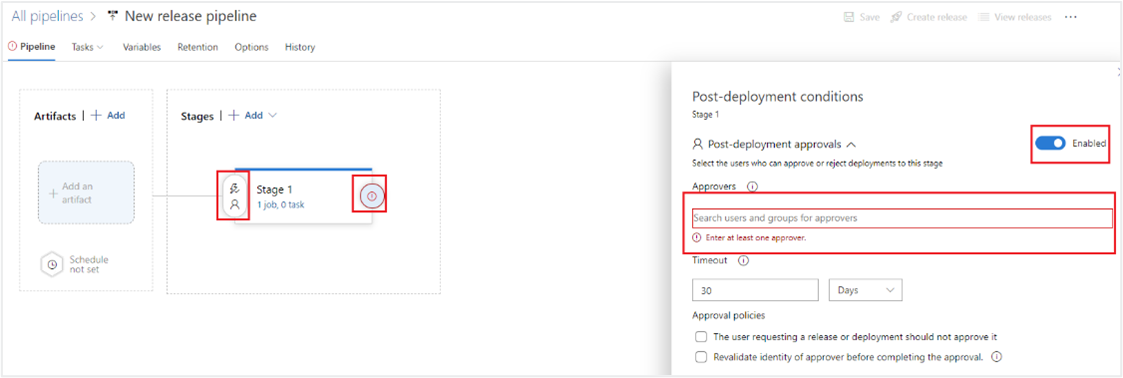
Save the pipeline
When you are done, save the pipeline.
Add more stages
After the Dev stage is set up and running, you need to create additional stages for the other environments.
- To do this, clone the current stage.
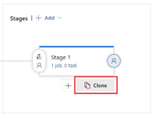
- Rename the stage with the relevant name. For example, QA or UAT.
- Change the deployment group job, by setting it to the deployment group of the current environment.
- The remaining steps are similar to creating the customization pipeline.
- After you are done, save the pipeline.


