V9.7
Overview
The Flowtime Lite portal Conversations View supports Lite messages only. For the Flowtime Lite portal to communicate with the internal system through messages, the internal system Conversations View supports Internal messages as an option.
Lite messages
The messages created within the Flowtime Lite portal are referred to as Lite messages. You need to enable the LiteMessage conversation type in your solution settings.
Enable LiteMessage conversation type
- In the Administration site, under Solutions, open the Flowtime Lite solution you have created.
- Go to Solution Components > Conversations View.
- In the Conversation View window, under General Settings > Conversation Types, select LiteMessage only.
By default, all conversation types are selected.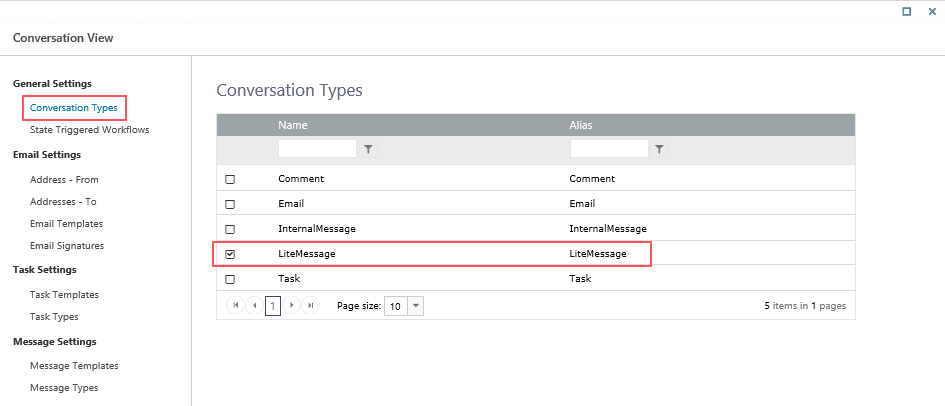

You can add the LiteMessage conversation type to the solution using the Conversations View built-in command.
To add Lite Messages to Conversations View, you can use the Create Conversation Item built-in-command.
- Add a Built-In Command activity to the form.
- Select Case Operations > Create Conversation Item.
- Click Next.
- Add the following command parameters:
- workflowInstanceId: the master or the sub workflow id.
- conversationItemState: For details, see this article.
- ConversationItem: select the Type as LiteMessageConversationItem.
- FormId: For a Form, value is the ActivityInstanceId. For a Task, value is the ActionItemId.
- FormType: value can be Form or Task.
- FormExecuted: whether the form is executed or not. Value can be True or False.
- From: relevant only for Incoming state.
- To: relevant only for Sent state.
- Body
- Attachments
- createdByUserId: Default is the current user executing the command activity.
- Click Finish.
IMPORTANT
Make sure you have Execute permissions in the master workflow.
Internal messages
To communicate through messages with the Lite portal, you can enable the InternalMessage conversation type in the solution settings of the internal system.
Enabling Internal message type conversation allows users to only reply to the incoming internal messages and doesn't allow creating new internal messages from the case conversation. The reply is sent only to the same recipients and no new recipient can be added to the To list.
Enable InternalMessage conversation type
- In the Administration site, under Solutions, open the solution you have created for the internal system.
- Go to Solution Components > Conversations View.
- In the Conversation View window, under General Settings > Conversation Types, select at least InternalMessage. You can select other conversation types except LiteMessage to add other communication types.
By default, all conversation types are selected.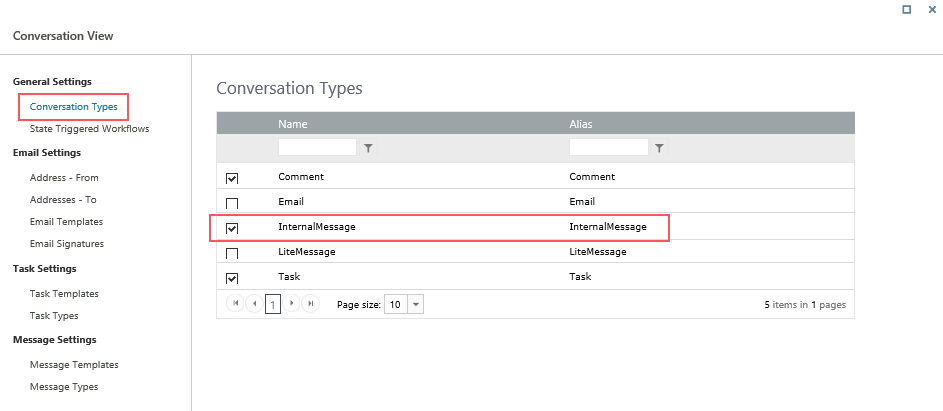

You can add the InternalMessage conversation type to the solution using the Conversations View built-in command.
To add Internal Messages to the Conversations View, you can use the Create Conversation Item built-in-command.
- Add a Built-In Command activity to the form.
- Select Case Operations > Create Conversation Item.
- Click Next.
- Add the following command parameters:
- workflowInstanceId: the master or the sub workflow Id.
- conversationItemState: should be Incoming, but can be any state.
For details, see this article. - ConversationItem: select the Type as InternalMessageConversationItem.
- To: relevant only for Sent state.
- From
- Type: relevant only for Sent state.
- Body
- Attachments
- createdByUserId: Default is the current user executing the command activity.
- Click Finish.
IMPORTANT
Make sure you have Execute permissions in the master workflow.
Message settings for internal messages
For internal messages, you can add the message templates and types using the Message Settings in the Conversation View window in the solution settings.
| Message setting | Description | Parameter |
|---|---|---|
| Message Templates | Create message templates that can be applied by the end users. |
|
| Message Types | Set up the types of messages end users can select while sending messages. |
|
Configure state triggered workflows
You can configure the system to initiate a specific workflow and perform an action when a conversation item changes to a specific status.
For details, see the Configure state triggered workflows section in this article.
