V9.0
Overview
It is common for organizational processes to include several steps, commonly referred to as workflow stages in Cora SeQuence. Workflow stages help end users understand what is required to move to the next stage of the process, and indicate what percentage of the process has been completed at a particular stage.
For example, a mortgage approval process might include several stages, each of which is a separate workflow.
- Application
- Credit check
- Background check
- Approval
There are two parts to workflow stages.
- Define the stages.
- Use the Set Stage Activity in the workflow at the relevant place.
Define workflow stages
- In the Administration site, edit a workflow for which stages are to be set.
- To define stages, click the workflow canvas, and in the Properties panel, select the ellipsis (...) next to Stage Set.
- To define a new stage to the workflow, in the Select Workflow Stage Set window, click New.
- Enter the following details:
- Name: name of the stage.
- Visible: You can configure when the stage is visible or hidden by edition the expression in the Workflow Stage Set.
The expression value, True or False, is calculated at runtime. The default value is True.
This parameter is relevant only for stage bars that are displayed in the runtime instance page. - Skipped: You can configure when a stage is skipped, that is, it is marked as incomplete.
The expression value, True or False, is calculated at runtime. The default value is False.
When the Skipped value is false, stages are marked as completed incrementally. For example, if a stage is before the "active" stage, it is marked as completed.
It is relevant only for stage bars that are displayed in the runtime instance page. - Percentage: Indicates the completion percentage of a workflow instance. Percentage value is absolute. The set value is the displayed value.
IMPORTANT
Expressions should be entered manually as the Stage Set wizard is outside the workflow context.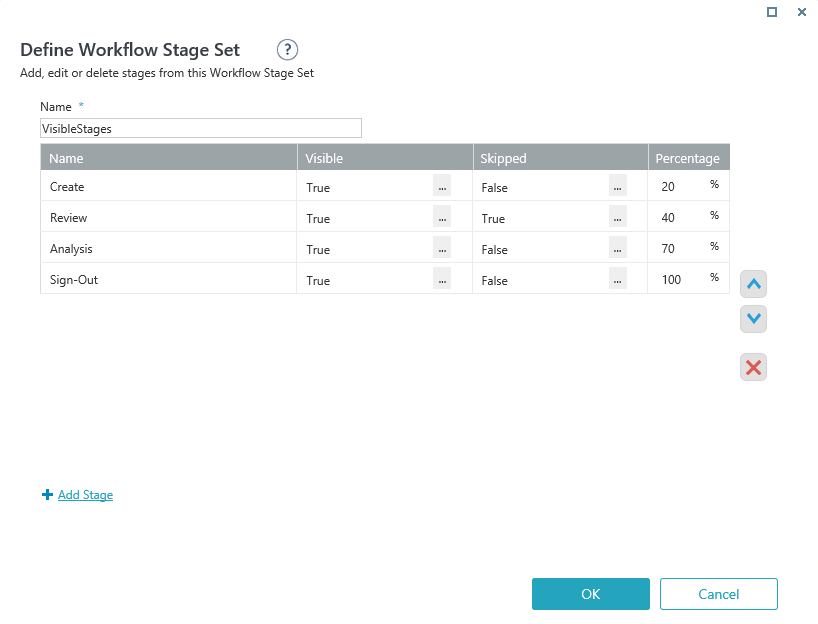
- To display the defined stages in the Runtime process instance page, select the Show workflow stage bar in process instance page check box in the Select Workflow Stage Set page.

Use Set Stage activity in a workflow
After the stages are defined, add a Set Stage activity to the workflow to make the stages "active" and display them in the instance page on Flowtime.
- Add a Set Stage activity in the workflow.
- Open the Set Stage activity, and define the relevant active process stage as per requirement.
You may choose from the list of defined workflow stages, or add an expression resulting in an existing stage name. - Connect the Set Stage activity in the workflow at the relevant place.
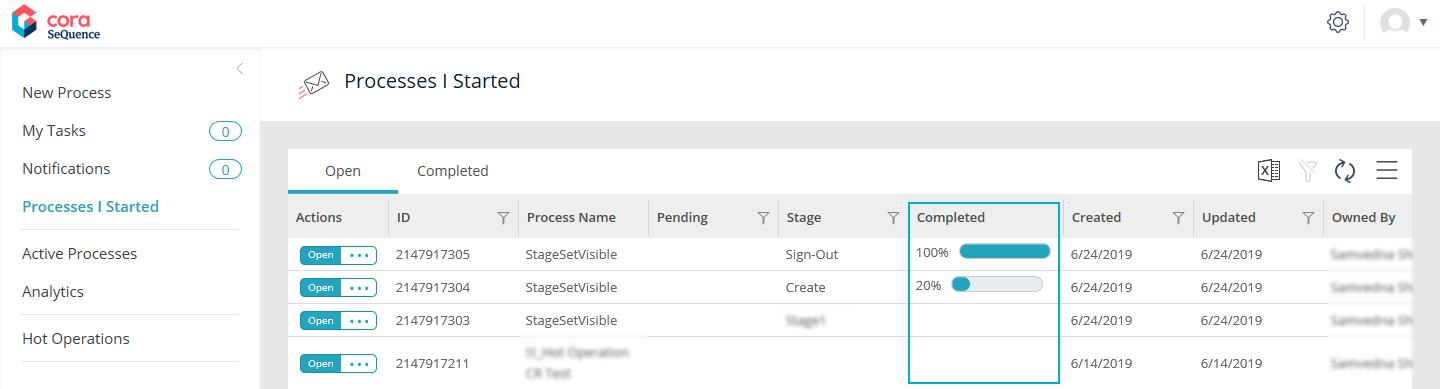
Based on your settings, the stage appears as "active" in the portal view and on the stage bar in runtime instance page, if the Show workflow stage bar in process instance page check box is selected.
Example

The completed stages appear with a check mark on the stage bar, while the skipped stages appear grayed out. For example, the Review stage in the above image is skipped.
You can view a task's completion percentage in the Completed column.
Set the stage bar position
The default position of the stage bar is inline on the runtime instance page. You can edit the WorkflowExplorer configuration file to change its position.
- Open the file:
Shared Resources\Components\WorkflowExplorer\Config\WorkflowExplorer.config - Edit the
stageBarLocationproperty, as required:- Inline (default)
- Top
- Bottom
- To change the position of the stage bar in the Process Lab (Administration site), change the same property in this file:
Shared Resources\Components\WorkflowExplorer\Config\WorkflowExplorer.debug.config
V8.8 and earlier
Context
It is common for organizational processes to have distinct process stages. Defining workflow stages helps end users understand what is required to move to the next stage of the process. There are two parts to workflow stages.
- Define the stages.
- Use the Set Stage Activity in the relevant place in the workflow.
Use Cases
A mortgage approval process might include several stages, each of which is a separate workflow.
- Application
- Credit check
- Background check
- Approval
Wizard Tips
- To start the wizard, in the App Studio, from the Properties panel, click the three dot button next to Stage Set.
- You can enter the stage's percentage, which indicates the completion percentage of a case in a HotOperations solution. The percentage displays for each case in the HotOperations work allocation board.
- To see the stages in the Flowtime process instance page, you must select the Show workflow stage bar in process instance page check box.
- You can configure the location of a workflow stage display, for example, up, down, or inline, in the workflow explorer configuration.
