V10.1
Overview
You can customize the Cora Orchestration portal based on customer needs. You use a Visual Studio template project that simplifies the customization process and helps you apply the required custom configuration.
You can apply common custom code such as change logo and portal colors, add new pages and menu items. You can also apply more complex customization using React.
Common customization configurations
- Replace the logo
- Edit CSS styles
- Customize menu items
- Customize the grid and board display
- Customize the grid menu
- Change the behavior of the Close tab button
- Create a page using the FormViewer control
- Localize portal text
- Create a new page using React
After you have validated that development environment is up and running, you can start setting up the required customization configurations.
See below an example of how to implement three customization requests.
- Add custom menu item
- Change logo
New logo location (example):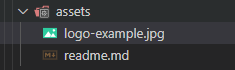
- Add a new page using the FormViewer control

Step 1: Apply the customization configuration in the template project
The first step is to open the template project with Visual Studio Code from the Template folder, and then:
- To add a custom menu item:
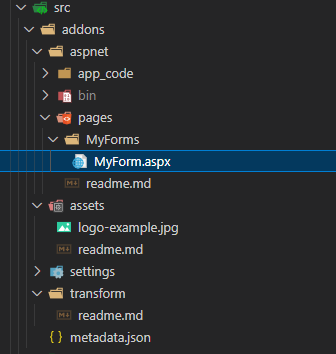
- Add an XML file with the new menu item in the src\addons\transform folder.
Make sure that you keep the Shared Resources folder's hierarchy.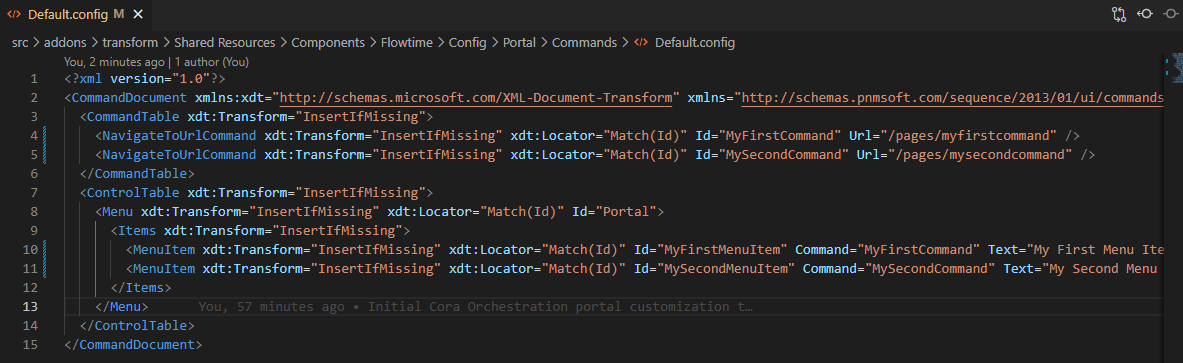
Note that this is a transformation file. Its content will be added to the original file without replacing it.
- Add an XML file with the new menu item in the src\addons\transform folder.
- To change the logo:
- Locate the appStyles.css file in the src folder.
- Change the sq-logo properties to point to the new logo image location.
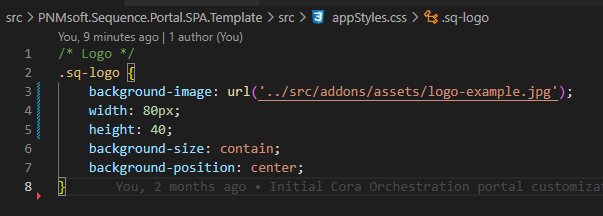
- Locate the appStyles.css file in the src folder.
- To add a new page using the FormViewer control, add the ASPX page with the FormViewer control to the src\addons\aspnet\pages folder.


TIP
Learn more about transformation APIs:
This step concludes the customization configuration, now you need to deploy the changes to IIS site.
Step 2: Deploy the customized site application on IIS
Run the oneClick_Custom_Local.ps1 PowerShell function to:
- Apply your customization to a saved snapshot of the original portal version downloaded from the repository.
- Replace the CoraSeQuenceFlowtime 1 site in IIS with the customized one.
- Prepare the custom snapshot.
NOTE
The oneClick_Custom_Local.ps1 function takes time to run as it works with snapshots.
TIP
You can maintain your template project in a source control tool. Your pull request then can trigger a pipeline that applies the customization and prepares a production-ready artifact for you.
Download a YAML of the pipeline.
PowerShell function screens

Step 3: Validate the deployed changes
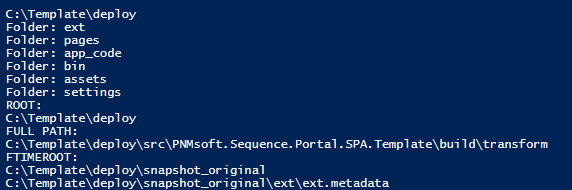
After the PowerShell function resumes running, check the IIS site structure.
As expected for the scenario described here, the App_Code, assets, and the updated menu items XML file are now in the IIS site.
Refresh the browser page, and view your changes.
IMPORTANT
Make sure that you apply your custom code with the project template only. Manual changes made on the IIS site files are not saved and will be overwritten by the PowerShell functions.
TIP
Development sometimes is a repetitive Do and test process. To save time, and expedite the development process, you may choose to update the locally-running IIS with the changes you made only. In this case, run the fast_Deploy_Local.ps1 function and refresh the page in the browser. The fast_Deploy_Local.ps1 function does not create snapshots of your customization and can be used when you only want to quickly check the results of your customization during development.
You must run the oneClick_Custom_Local.ps1 function once, as it builds the structure for the customization process. Afterwards, you can run the fast_Deploy_Local.ps1 to save time when validating your changes.
Customize another site
The custom snapshot can be used as the base for another customization. In this case, edit the 2_download_Original_File_Local.ps1 function and specify the URL of the already customized portal.
