Overview
User interfaces created with React do not have "pages". What we see in the browser are React components mapped to routes. Route is a configuration that tells React to render specific components while the navigation URL equals to the route key in the configuration.
To create what we would traditionally call a “custom page,” you need to create a new component, register it to routes, and then export it to the main portal application.
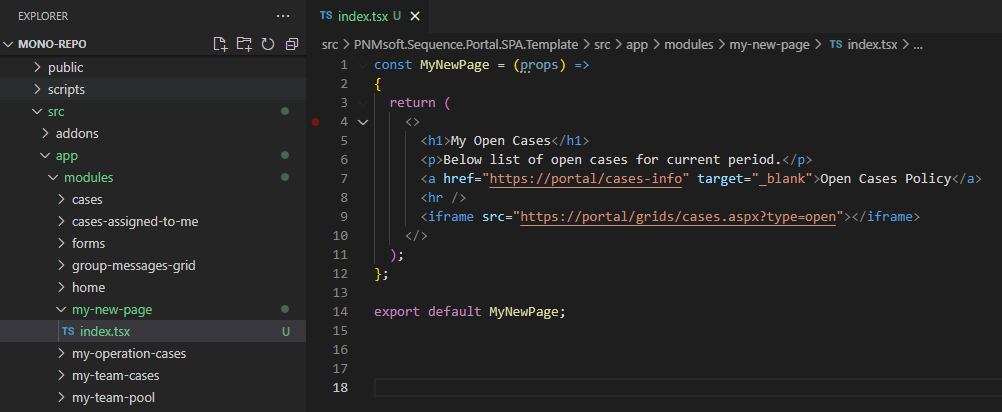
The location of the “custom page” component is /src/app/modules/xxxxxx/index.tsx.
Where:
xxxxxx is the custom page name without spaces or any special characters.
index.tsx is the file with component’s code.
Example
Routes registration
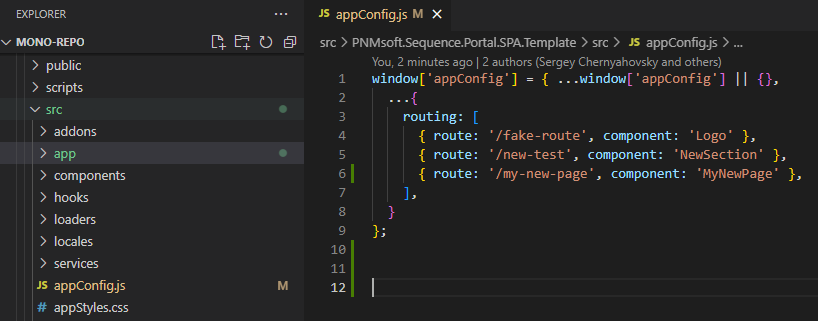
You register the new component at /src/appConfig.js, under the routing section.

Component export
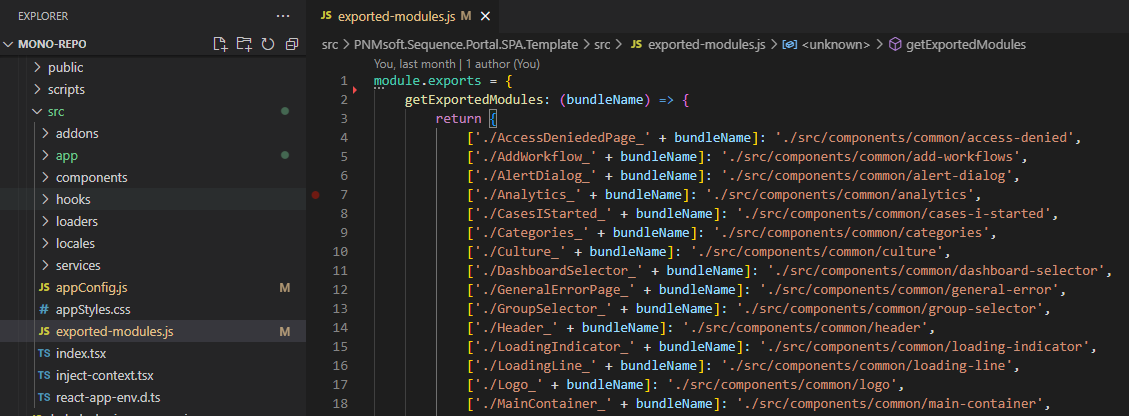
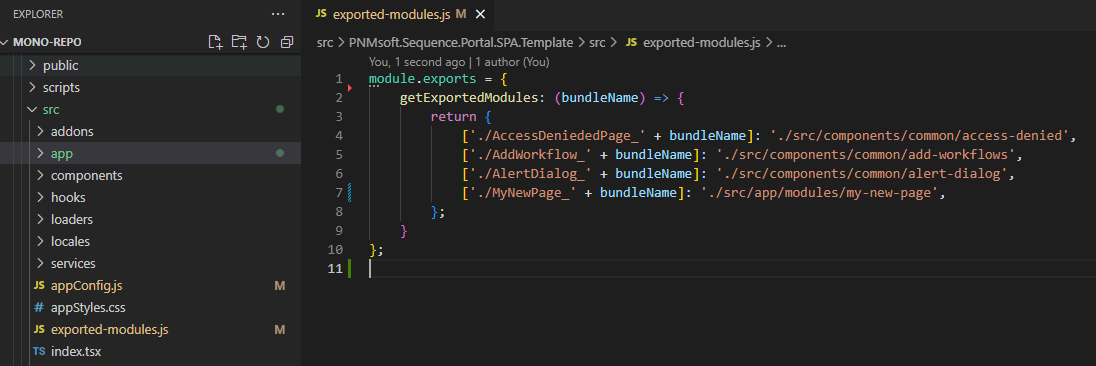
You configure the component export in the config file located at /src/exported-modules.js.

Custom component creation example
- Create a new folder at /src/app/modules/my-new-page
- Create an index.tsx file at /src/app/modules/my-new-page
- Add the React component code to the index file at /src/app/modules/my-new-page/index.tsx
- Register the new component in the Routes configuration.
- Export the component to main portal application.
New React component
 | Line 1: Component name. The component name must be unique across main objects and template projects. Line 3: Component render section. Mandatory code Line 4-10: All the components markup in JSX format. Line 9: Render external page. Required for legacy portal APSX content. Line 14: Export component. Mandatory line |
Routes configuration
 | Line 6: Added new route /my-new-page to the MyNewPage component. IMPORTANT The routing key must be unique across main objects and template projects. |
Export component
 | Line 7: Added export to the MyNewPage component to portal main application. IMPORTANT Note the export naming convention. It is mandatory and can’t change. |
