V9.4
Overview
Cora SeQuence supports multiple languages. With minimal effort, you can configure a Flowtime environment in any supported language. Multilingual support enables you to translate the following metadata values:
- Activity Alias
- Activity Description
- Workflow Alias
- Workflow Description
- Message Subject
- Message Body
- Expression Value
NOTE
Translating a workflow should be the last step of the workflow development process.
Supported Languages
Cora SeQuence supports several languages out-of-the-box.
- Dutch
- English
- French
- Hebrew
- Portuguese
- Spanish
- Japanese
You can configure additional languages with minimal effort.
Create and translate the resource file
You need to perform several procedures to prepare your workflow for translation.
- Create the resource file.
- Configure the workflow in App Studio.
- Translate the workflow metadata.
Create the resource file
The first time you perform the workflow translation procedure, Cora SeQuence creates a directory and a language-specific resource file for the workflow.
| Resource | Location/Name |
|---|---|
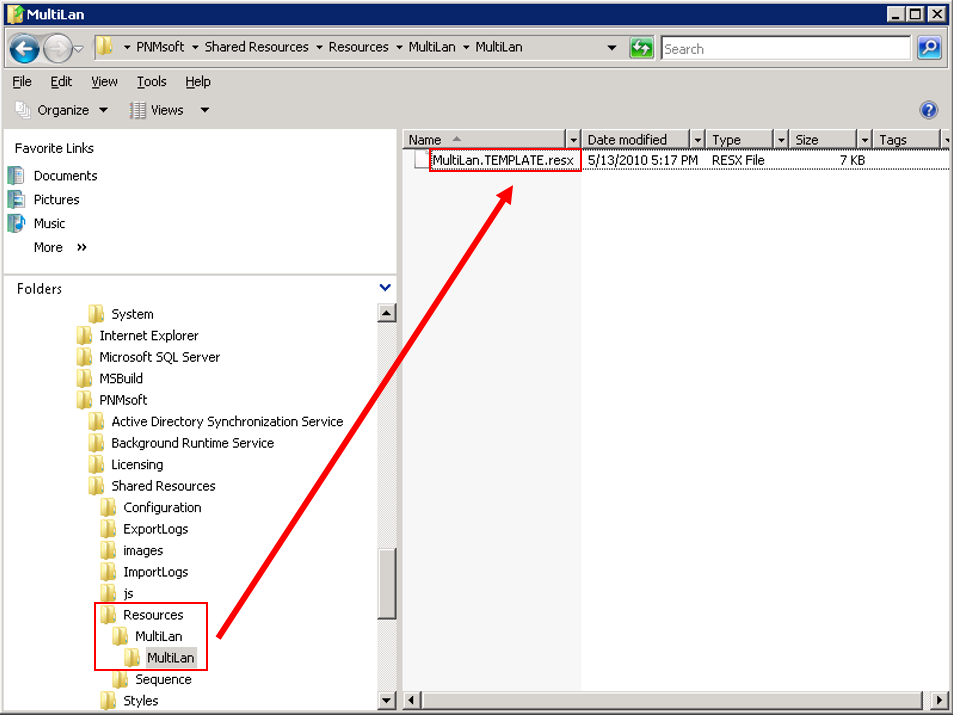
| Directory | C:\Program Files\PNMsoft\Shared Resources\Resources\<Your Workflow Name> directory |
| Resource File | <Your Workflow Name>.TEMPLATE.resx |
You will make all future modifications to this file. For example, if you have designed a workflow in English, and want to translate the workflow to French, copy the template file and rename it to<Your Workflow Name>.fr-FR.resx.
NOTE
fr-FR is the target language culture, and as such is hierarchically structured.
For more details on the CultureInfo Class, see this page.
Configure the workflow in App Studio
There are several parameters in the Globalization section of the Properties panel that require configuration and resolution before you translate the workflow. To access the parameters, navigate to App Studio > Properties panel > Globalization section.To enable these features, set the Localizable parameter to True.
| Field | Description |
| Formatting | Formatting defines how dates and numbers display. Formatting is determined by one of the following.
|
| Language | The language is determined by one of the following:
|
Translate the workflow metadata
- Open the workflow in App Studio.
- Navigate to App Studio > Properties panel > Globalization section, and set the Localizable parameter to True.
You must perform this configuration every time you add a new activity to the workflow. After you add the new activity, set the Localizable parameter to False and then set it back to True. - (Optional) Edit the resource file name to reflect the translation target language.
- Open the resource file in a text editor, and translate the content of the Value column.
Visual Studio offers a convenient Excel-like experience. - Perform IISReset to implement the modifications.
Workflow runtime expressions
Runtime Cora SeQuence expressions is an efficient tool for retrieving any information you need related to the runtime context. For more information, see this article.
Runtime expressions enable users to retrieve data from the workflow resource file. You can use expressions to define default values, business roles, and much more, by using the following expression:rt.GetResourceString(<key from resource file>).
For example, to return the localized workflow alias:rt.GetResourceString("ApprovalKey").
When you use Runtime expressions make sure that all available languages have a resource file.
For example:<sq8:Label runat="server" Text='<%$sq8: rt.GetResourceString("Request_Form_Comment") %>' />.
You can also use<%$ Resources:MyResourceFile,LabelText%>to hold the expressions. If you do this, you will have to maintain the translations in two locations.
Create or edit a runtime expression
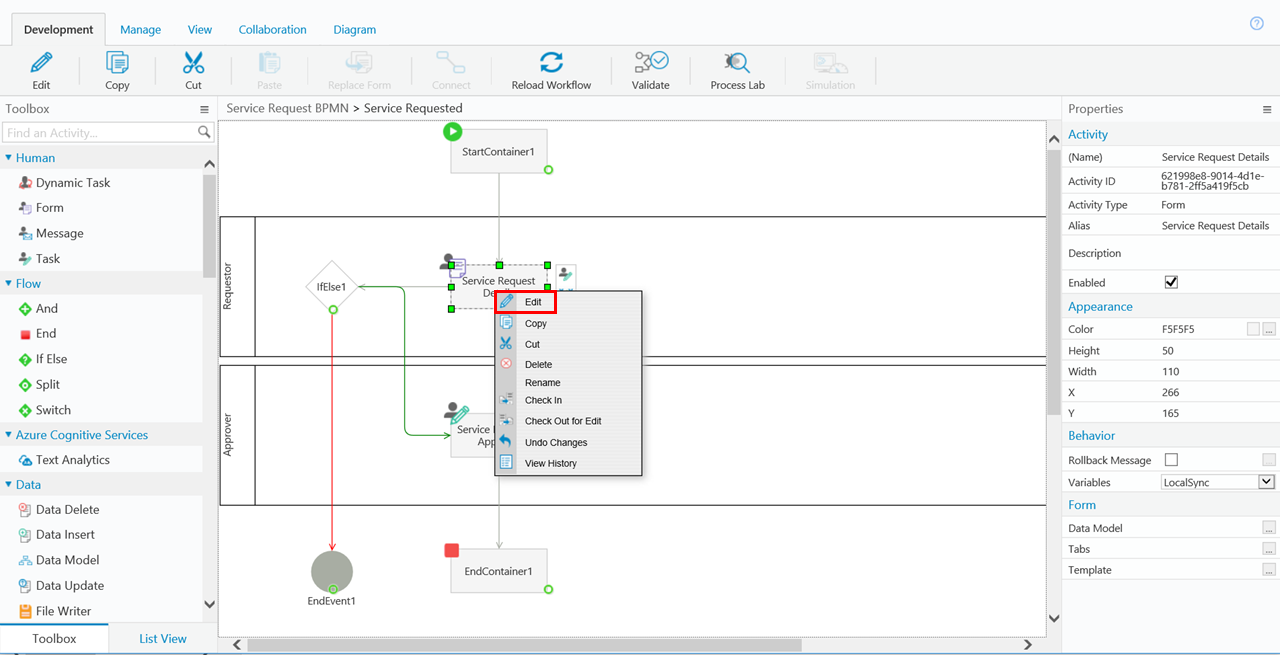
- In App Studio, right-click the activity you want to edit and select Edit.
- In UX Studio, click the arrow next to a form field and click <New field...> to access the data field window.

- Select a data field that you want to edit.
As an example, we are going to assign a default value for the RequestDate field in the form. - In the Properties panel, click the ellipsis button next to the Default Value field.
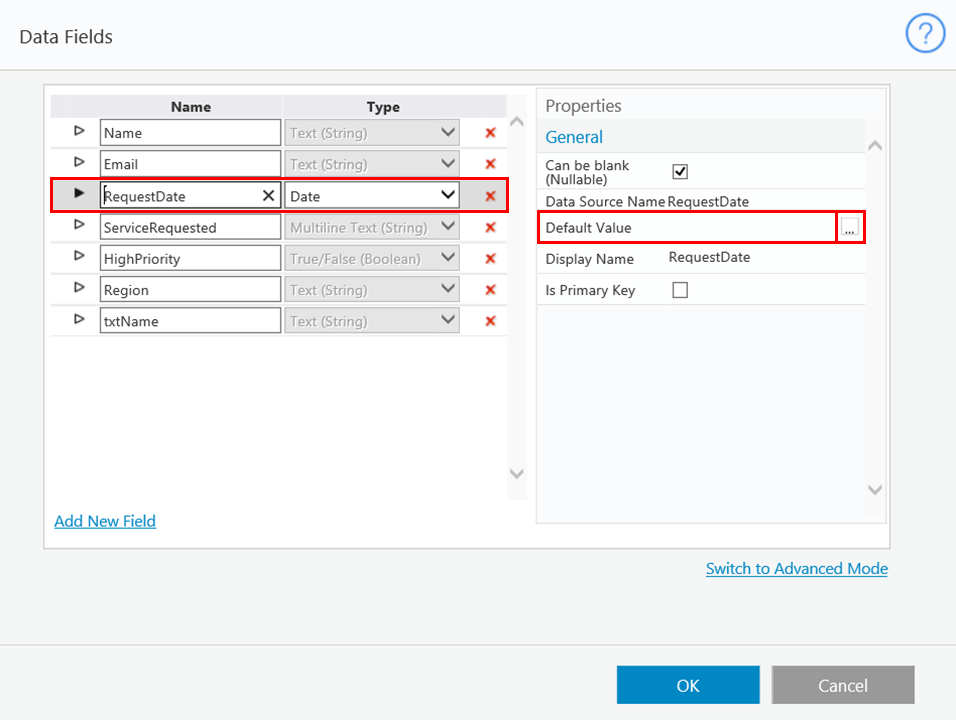
- Assign a default value for the RequestDate field.
For our example, we are going to assign the default value as the current day.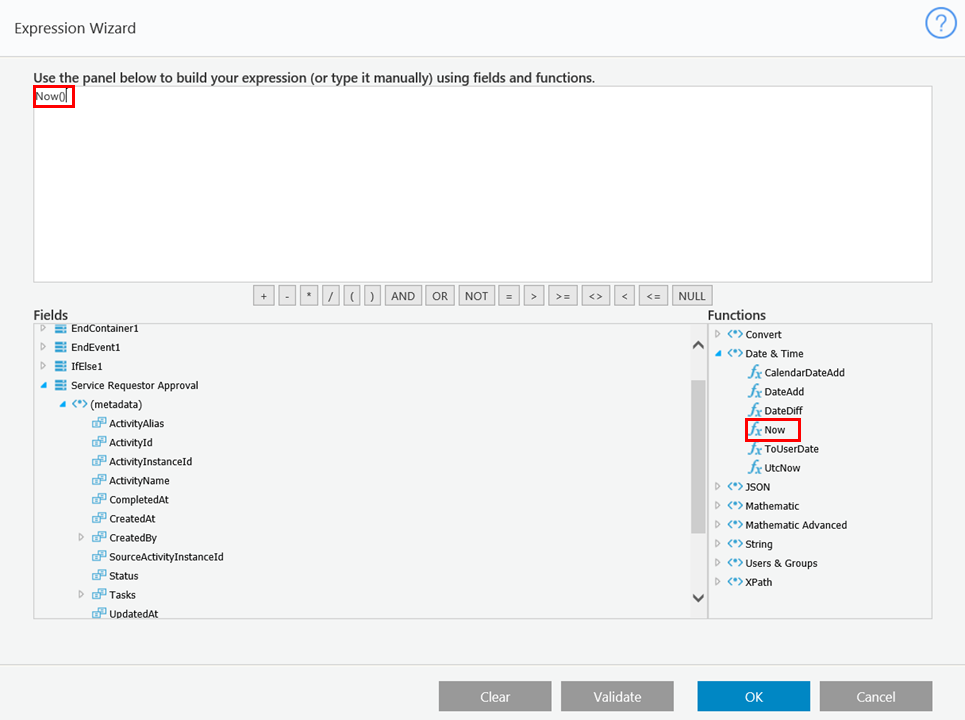
- Click Validate.


Create a multilingual form
You can create a Form in any supported language of your choice.
For details on creating a multilingual form, see this article.
Cora SeQuence Flowtime Behavior
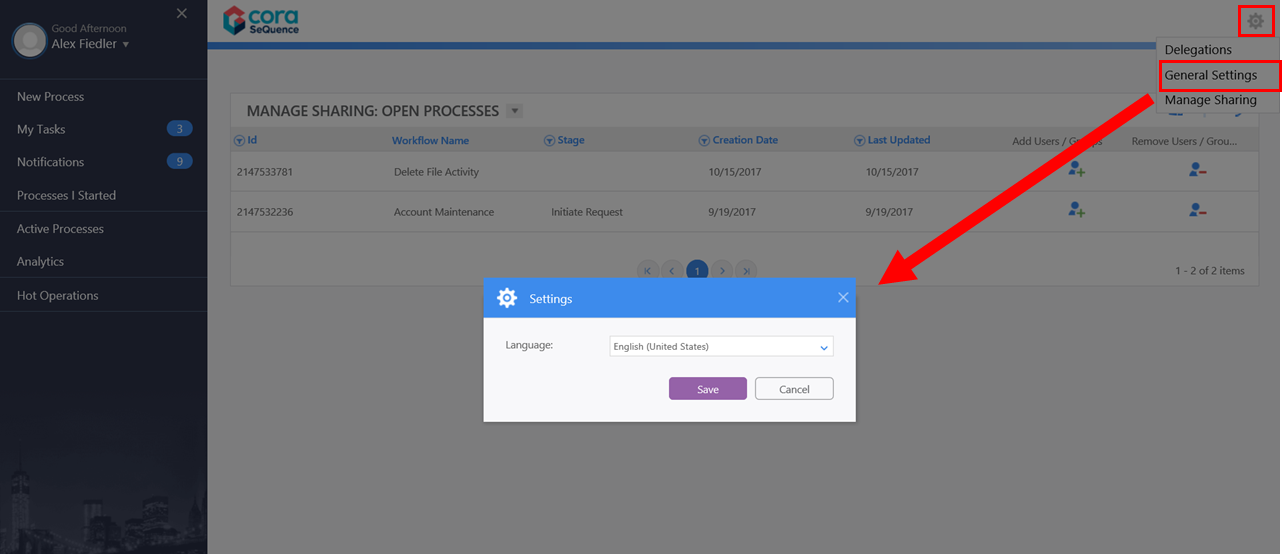
Follow this procedure to change the display language in Flowtime.
In Flowtime, click the Settings icon > General Settings, and select a language.

Translate Flowtime Categories
- Create a
.resxfile for each language that you want to translate the categories into.
The file should include the translated alias and description for each category. For example, if you want to translate the categories into French, the file should beCategories.fr-FR.Resx. The keys in the file would be CategoryName_Alias and CategoryName_Description. If one of the categories is Retail Banking, this is what the file would look like.<data name="Retail Banking_Alias" xml:space="preserve"> <value> Retail Banking Fr</value> </data> <data name=" Retail Banking _Description" xml:space="preserve"> <value> Retail Banking Description Fr</value> </data> <data name="[CategoryName2]_Alias" xml:space="preserve"> <value>Category 2 Fr</value> </data> <data name="[CategoryName2]_Description" xml:space="preserve"> <value>Category 2 Description Fr</value> </data>
- Create a folder named
PortalinShared Resource\Resources\Sequence. - Put the category translation
.resxfiles in thePortalfolder.
V8.4 and earlier
Overview
Cora SeQuence supports multiple languages. With minimal effort, you can configure a Flowtime environment in any supported language. Multilingual support enables you to translate the following metadata values:
- Activity Alias
- Activity Description
- Workflow Alias
- Workflow Description
- Message Subject
- Message Body
- Expression Value
NOTE: Translating a workflow should be the last step of the workflow development process.
Supported Languages
Cora SeQuence supports several languages out-of-the-box. You can configure additional languages with minimal effort.
- Dutch
- English
- French
- Hebrew
- Portuguese
- Spanish
Create and Translate the Resource File
You need to perform several procedures to prepare your workflow for translation.
- Create the resource file.
- Configure the workflow in App Studio
- Translate the workflow metadata
Create the resource file
The first time you perform the workflow translation procedure, sCora SeQuence creates a directory and a language-specific resource file for the workflow.
| Resource | Location/Name |
|---|---|
| Directory |
|
| Resource File |
|
You will make all future modifications to this file. For example, if you designed a workflow in English, and want to translate the workflow to French, copy the template file and rename it to <Your Workflow Name>.fr-FR.resx.
NOTE: fr-FR is the target language culture, and as such is hierarchically structured. For more details on the CultureInfo Class, see http://msdn.microsoft.com/en-us/library/system.globalization.cultureinfo.aspx.
Configure the workflow in App Studio
There are several parameters in the Globalization section of the Properties panel that require configuration and resolution before you translate the workflow. To access the parameters, navigate to App Studio > Properties panel > Globalization section. To enable these features, set the Localizable parameter to True.
| Field | Description |
| Formatting | Formatting defines how dates and numbers display. Formatting is determined by one of the following.
|
| Language | The language is determined by one of the following:
|
Translate the workflow metadata
- Open the workflow in App Studio.
- Navigate to App Studio > Properties panel > Globalization section, and set the Localizable parameter to True.
You must perform this configuration every time you add a new activity to the workflow. After you add the new activity, set the Localizable parameter to False and then set it back to True.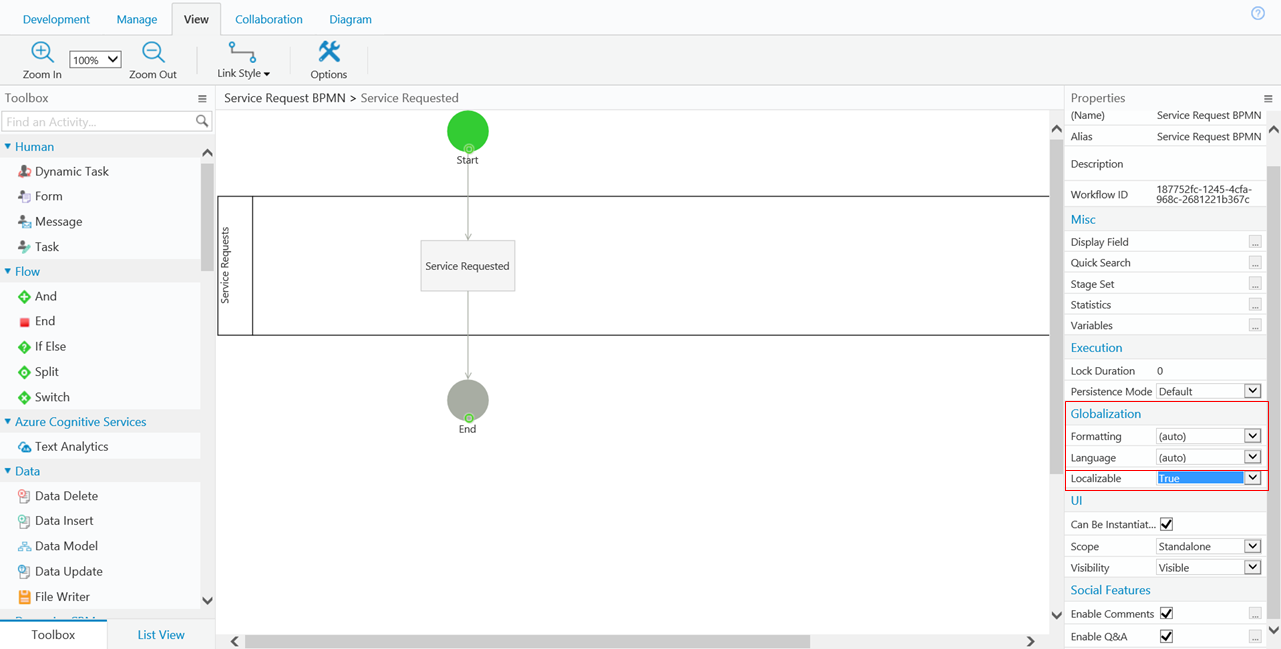
- (Optional) Edit the resource file name to reflect the translation target language.
- Open the resource file in a text editor and translate the content of the Value column.
Visual Studio offers a convenient Excel-like experience.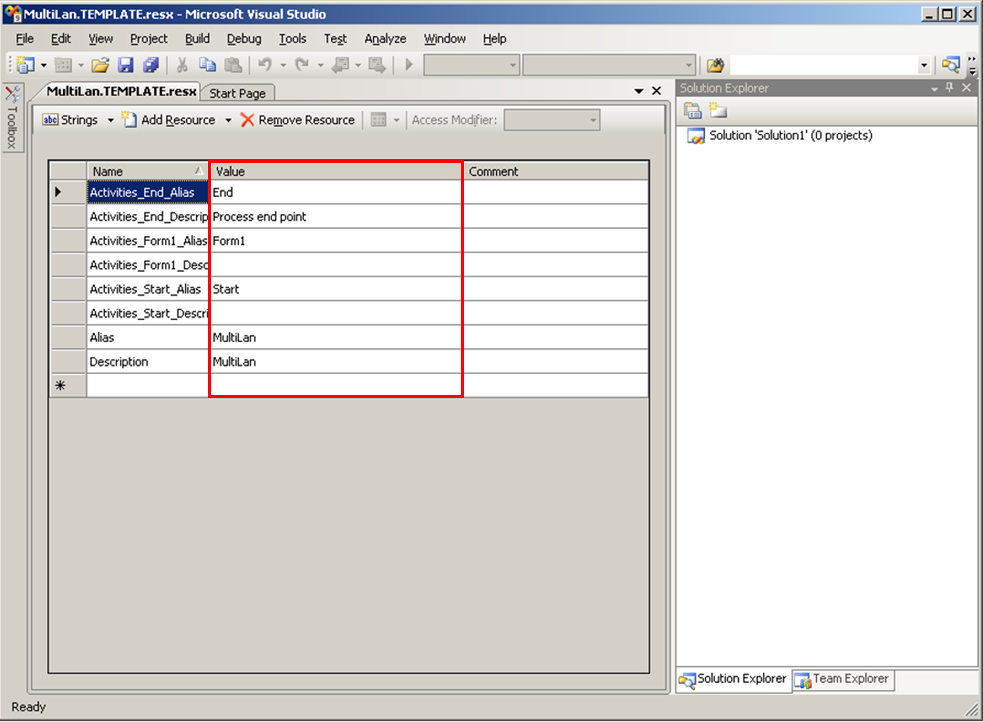
- Perform IISReset to implement the modifications.


Workflow Runtime Expressions
Runtime Cora SeQuence expressions is an efficient tool for retrieving any information you need related to the runtime context. For more information, see Understanding Expressions.
Runtime expressions enable users to retrieve data from the workflow resource file. You can use expressions to define default values, business roles, and much more, by using the following expression: rt.GetResourceString(<key from resource file>). For example, to return the localized workflow alias: rt.GetResourceString("ApprovalKey").
When you use Runtime expressions make sure that all available languages have a resource file. For example: <sq8:Label runat="server" Text='<%$sq8: rt.GetResourceString("Request_Form_Comment") %>' />.
You can also use <%$ Resources: MyResourceFile, LabelText %> to hold the expressions. If you do this, you will have to maintain the translations in two locations.
Create or edit a runtime expression
- In App Studio, right-click the activity you want to edit and select Edit.
- In UX Studio, click the arrow next to a form field and click <New field...> to access the data field window.
- Select a data field that you want to edit.
As an example, we are going to assign a default value for the RequestDate field in the form. - In the Properties panel, click the ellipsis button next to the Default Value field.
- Assign a default value for the RequestDate field.
For our example, we are going to assign the default value as the current day. - Click Validate.
Create a Multilingual Form
- In Visual Studio, create a resource file for the language that you want to create for the form.
Example:MyResourceFile.resx - Add values to the resource file, in which the key is the value used in the form's markup and the "value" is the display value in runtime.
- Translate the resource file to the new language, and name it with a corresponding extension.
Example:MyResourceFile.fr.resx - Copy the resource files to the application's
App_GlobalResourcesdirectory.
TheApp_GlobalResourcesdirectory is located in the application root directory. For example, in the default Flowtime installation, the path is:C:\inetpub\wwwroot\Workflow Runtime\App_GlobalResources. If this directory does not exist, you need to create it. - In your forms, use the key as we show it in the exmple below.
<sq8:Label runat="server" Text="<%$ Resources: MyResourceFile, LabelText %>" />
Cora SeQuence Flowtime Behavior
Follow this procedure to change the display language in Flowtime.
In Flowtime, click the Settings icon > General Settings, and select a language.
Translate Flowtime Categories
- Create a
.resxfile for each language that you want to translate the categories into.
The file should include the tranlsated alias and description for each category. For example, if you want to translate the categories into French, the file should beCategories.fr-FR.Resx. The keys in the file would be CategoryName_Alias and CategoryName_Description. If one of the categories is Retail Banking, this is what the file would look like.<data name="Retail Banking_Alias" xml:space="preserve"> <value> Retail Banking Fr</value> </data> <data name=" Retail Banking _Description" xml:space="preserve"> <value> Retail Banking Description Fr</value> </data> <data name="[CategoryName2]_Alias" xml:space="preserve"> <value>Category 2 Fr</value> </data> <data name="[CategoryName2]_Description" xml:space="preserve"> <value>Category 2 Description Fr</value> </data>
- Create a folder named
PortalinShared Resource\Resources\Sequence. - Put the category translation
.resxfiles in thePortalfolder.
